
Run through the four quick checks first if this is your first eSIM.
1
Open your plan
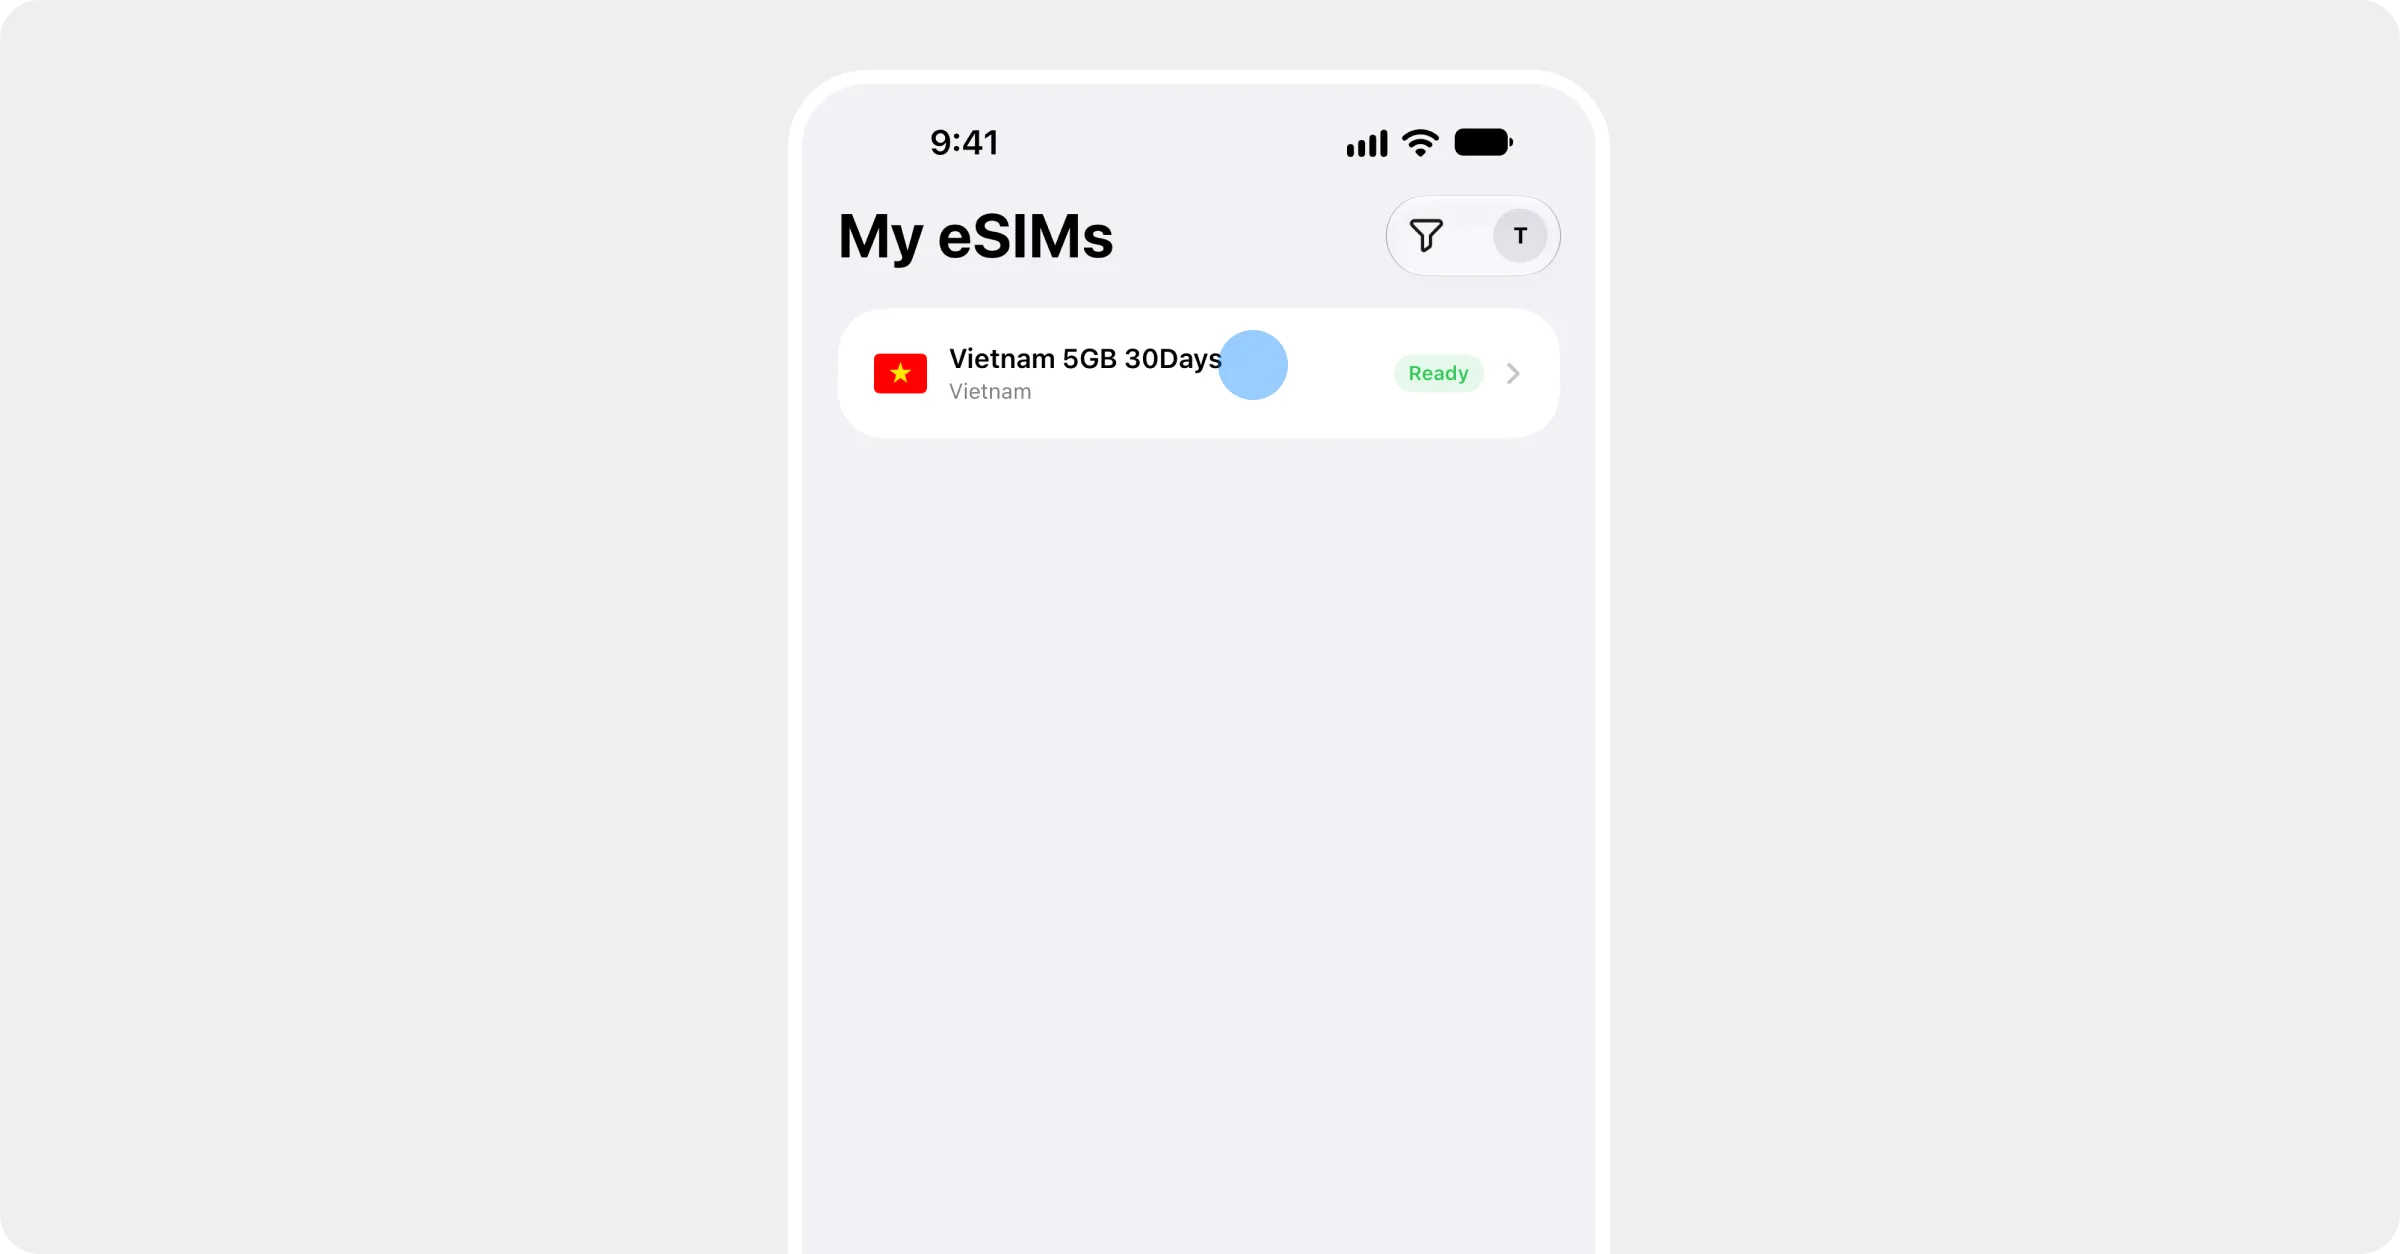
In the Roamly app, open the My eSIMs tab and tap your plan. When it’s ready to install, it’s marked Ready.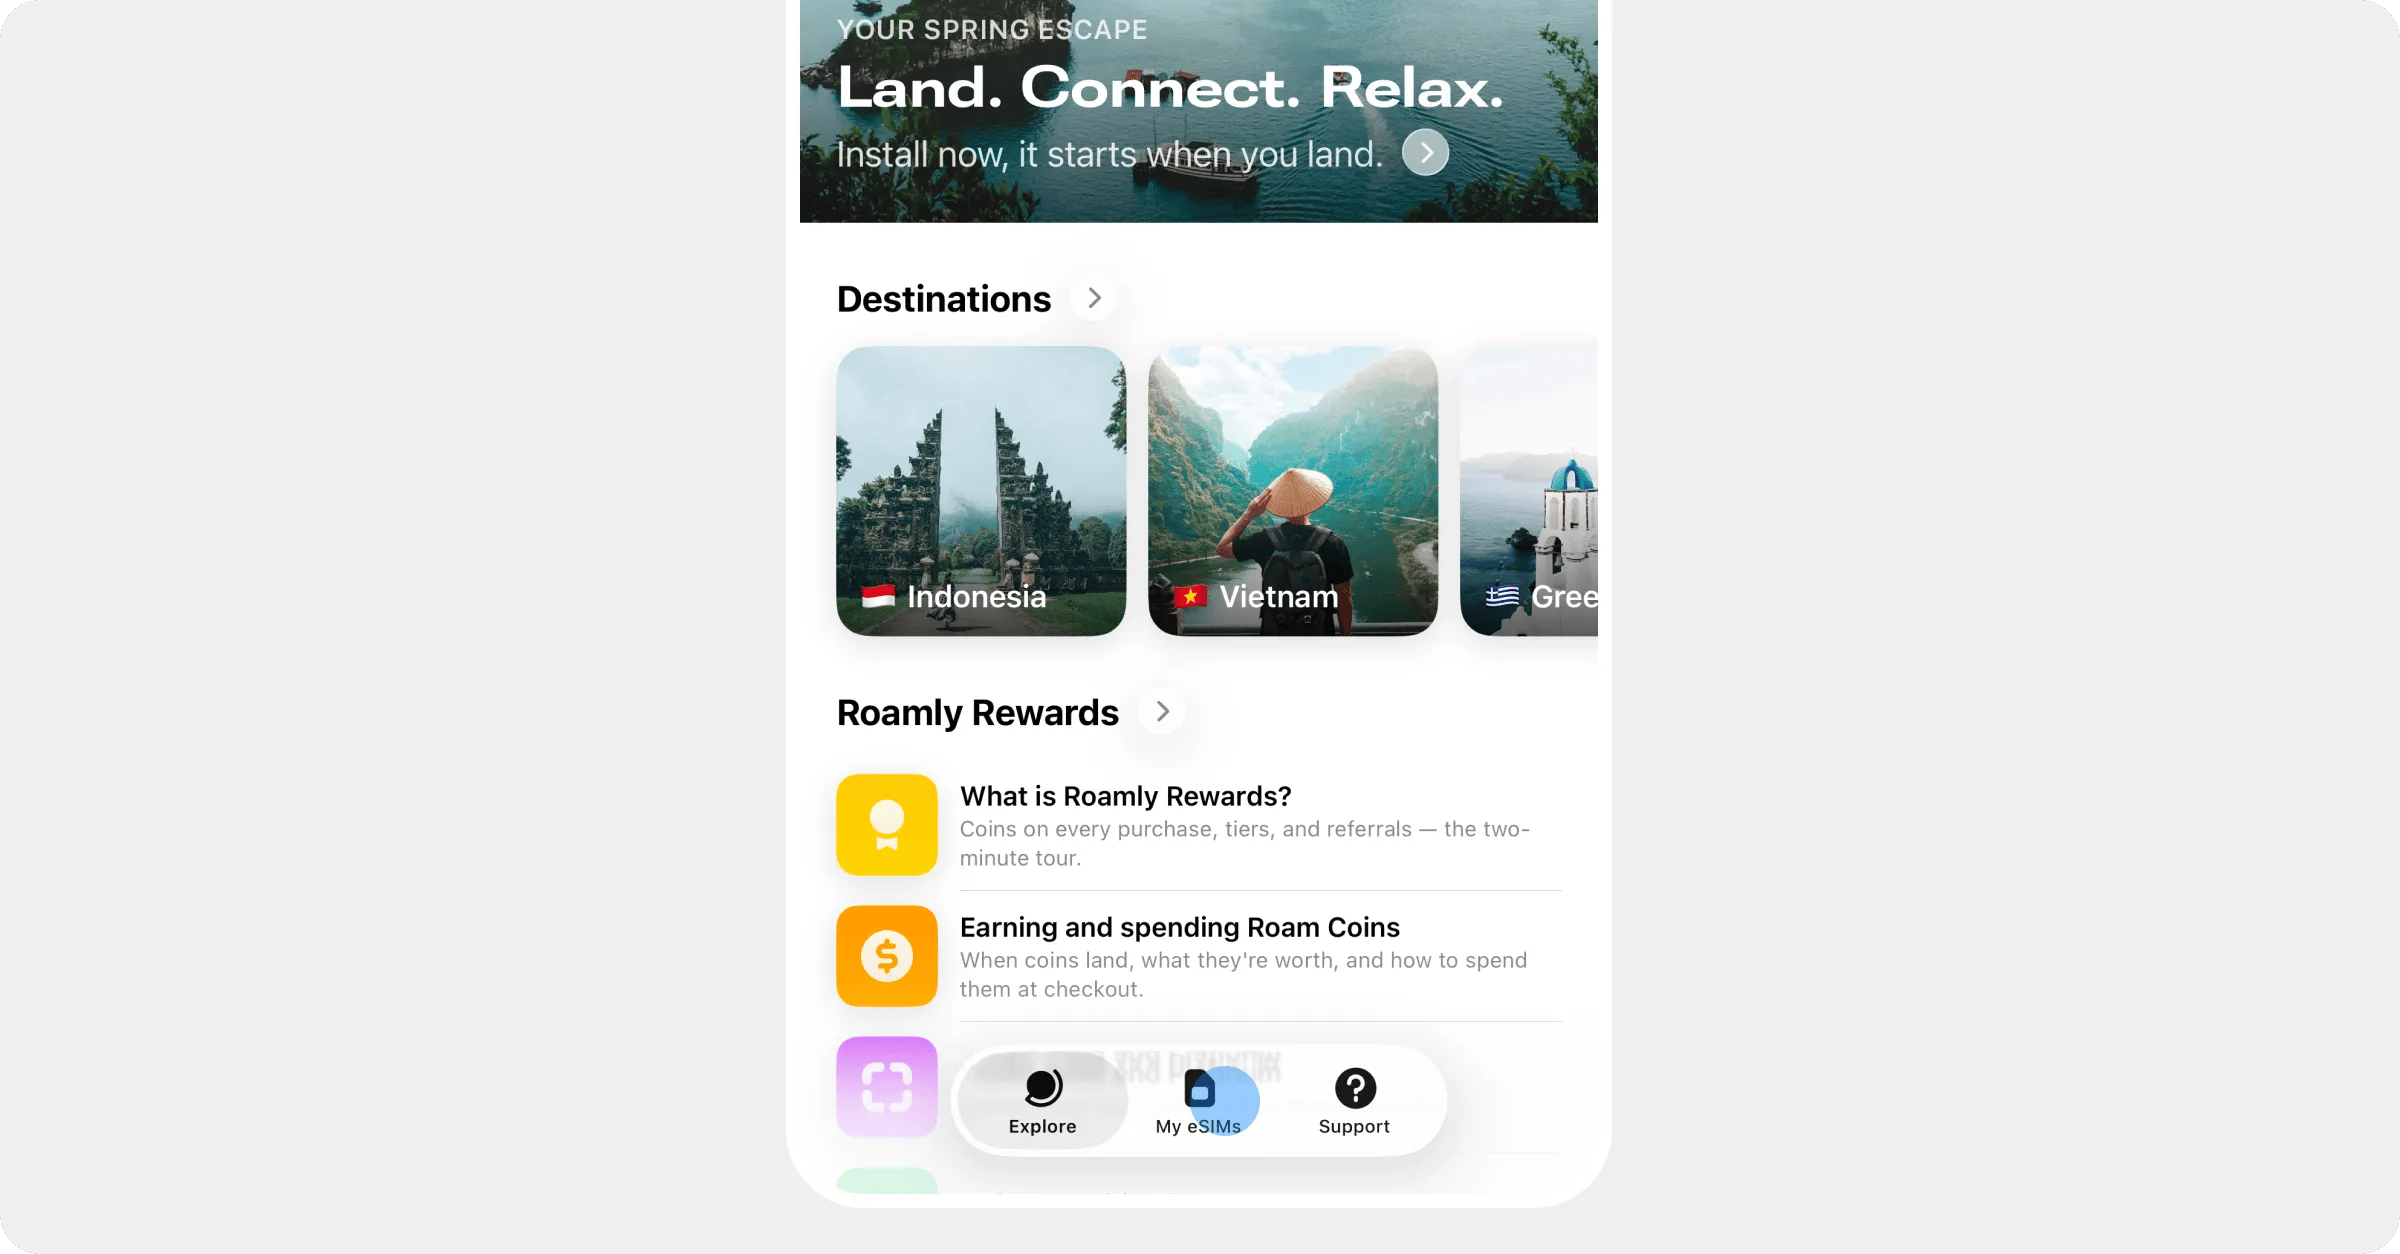
2
Tap Install on this device
Under Your eSIM is ready, tap Install on this device.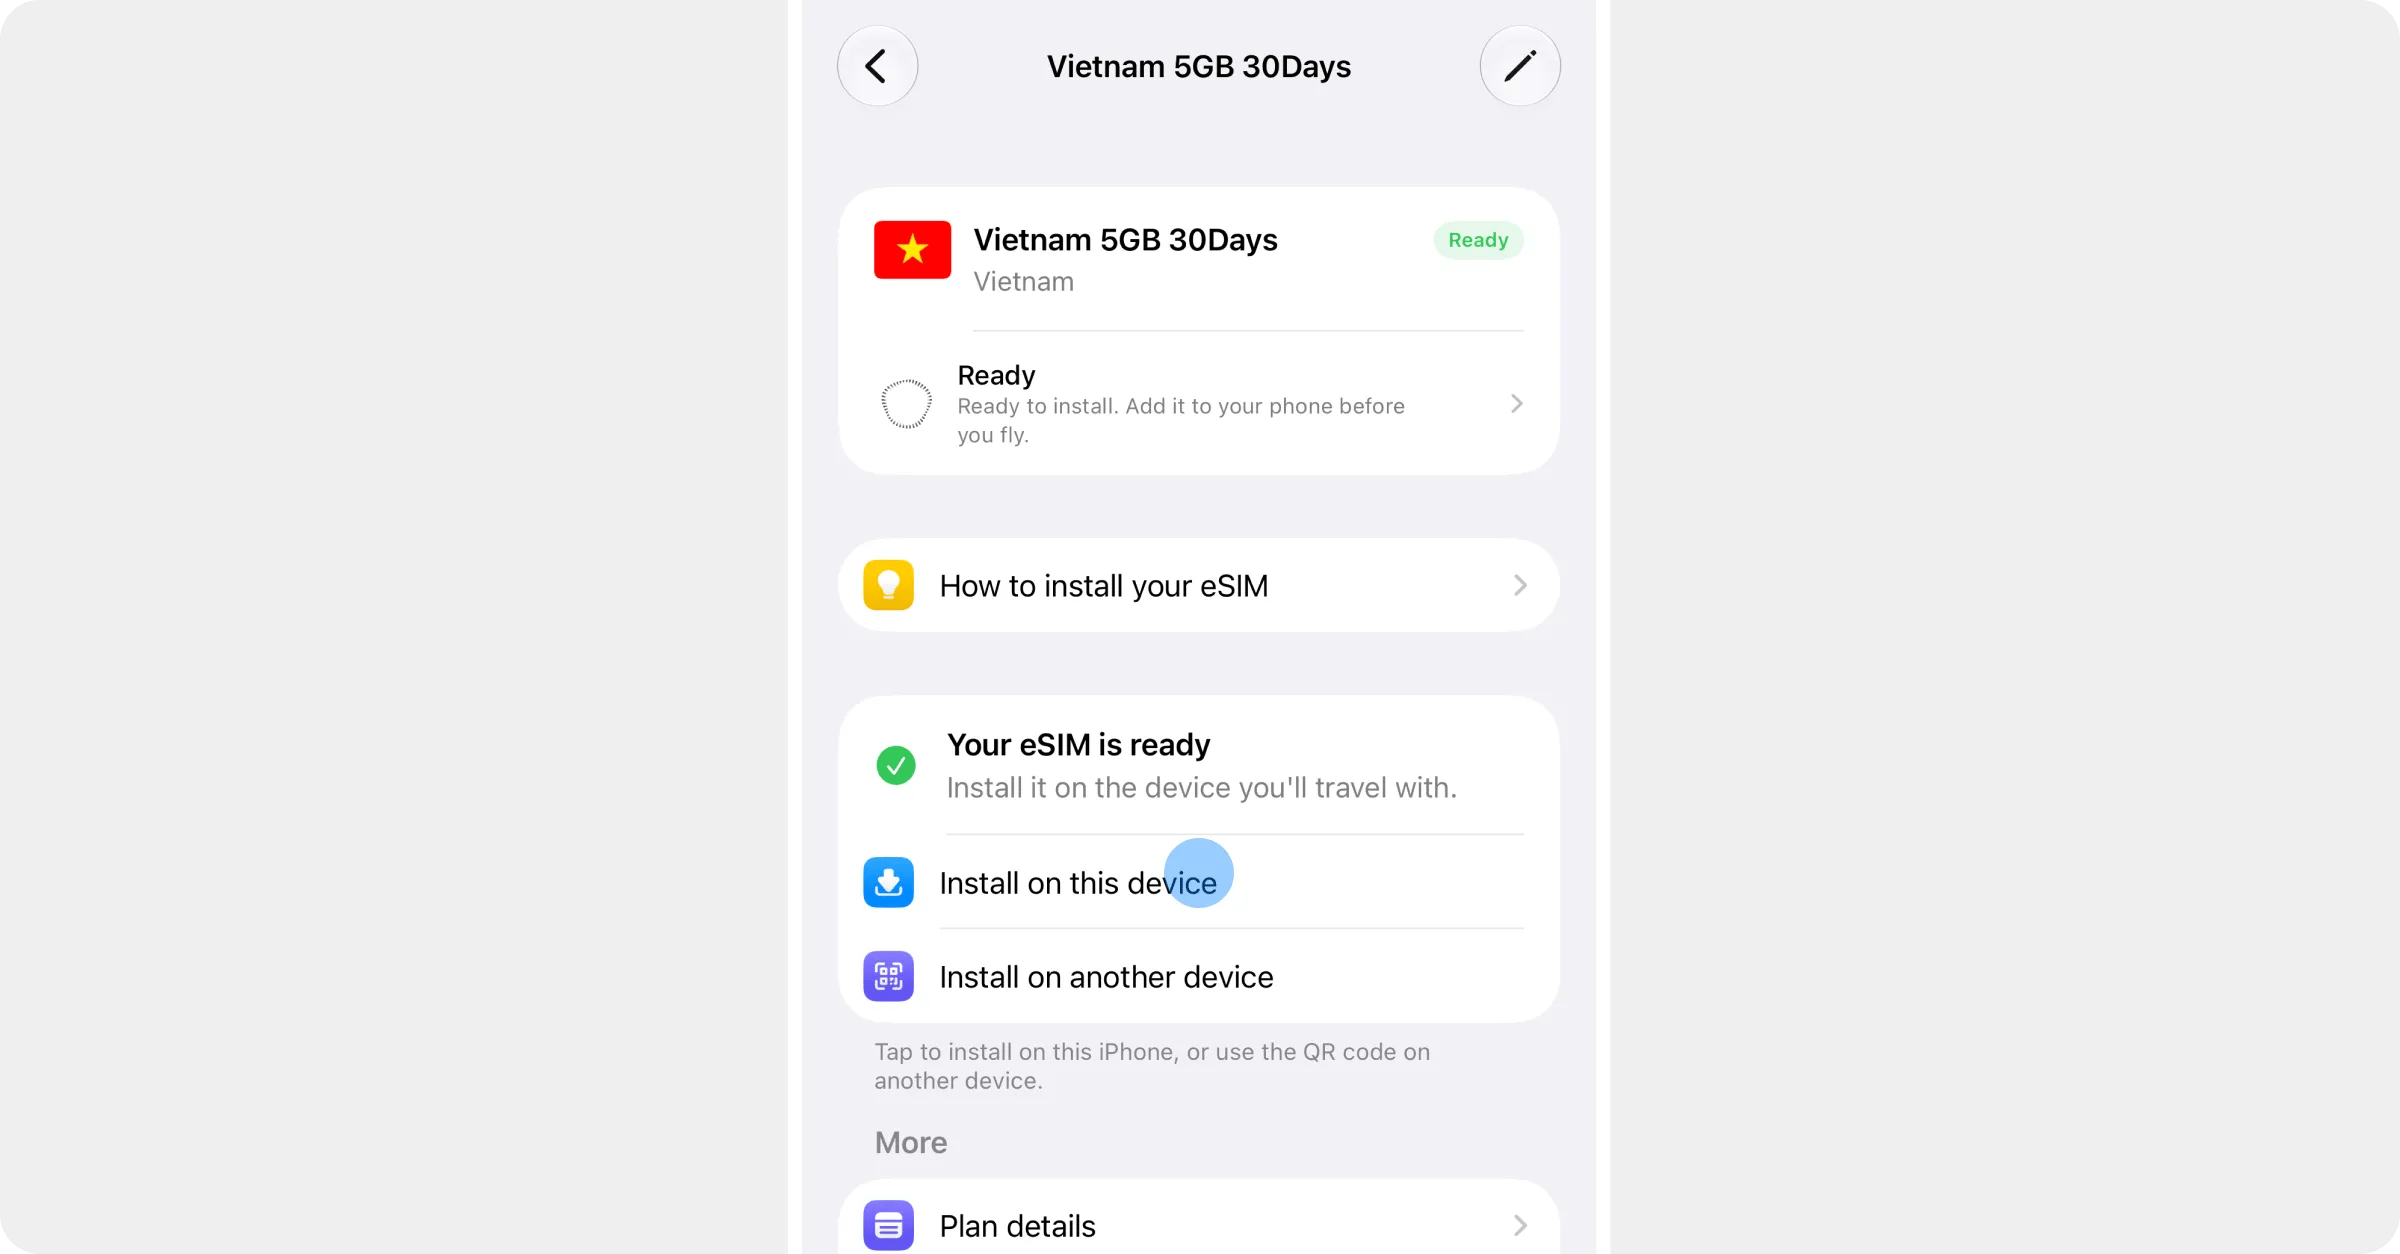
3
Tap Activate
iOS opens Settings and asks to activate your eSIM. Tap Activate. The message about sharing your EID with the service provider is normal: it’s how every eSIM is delivered to a phone.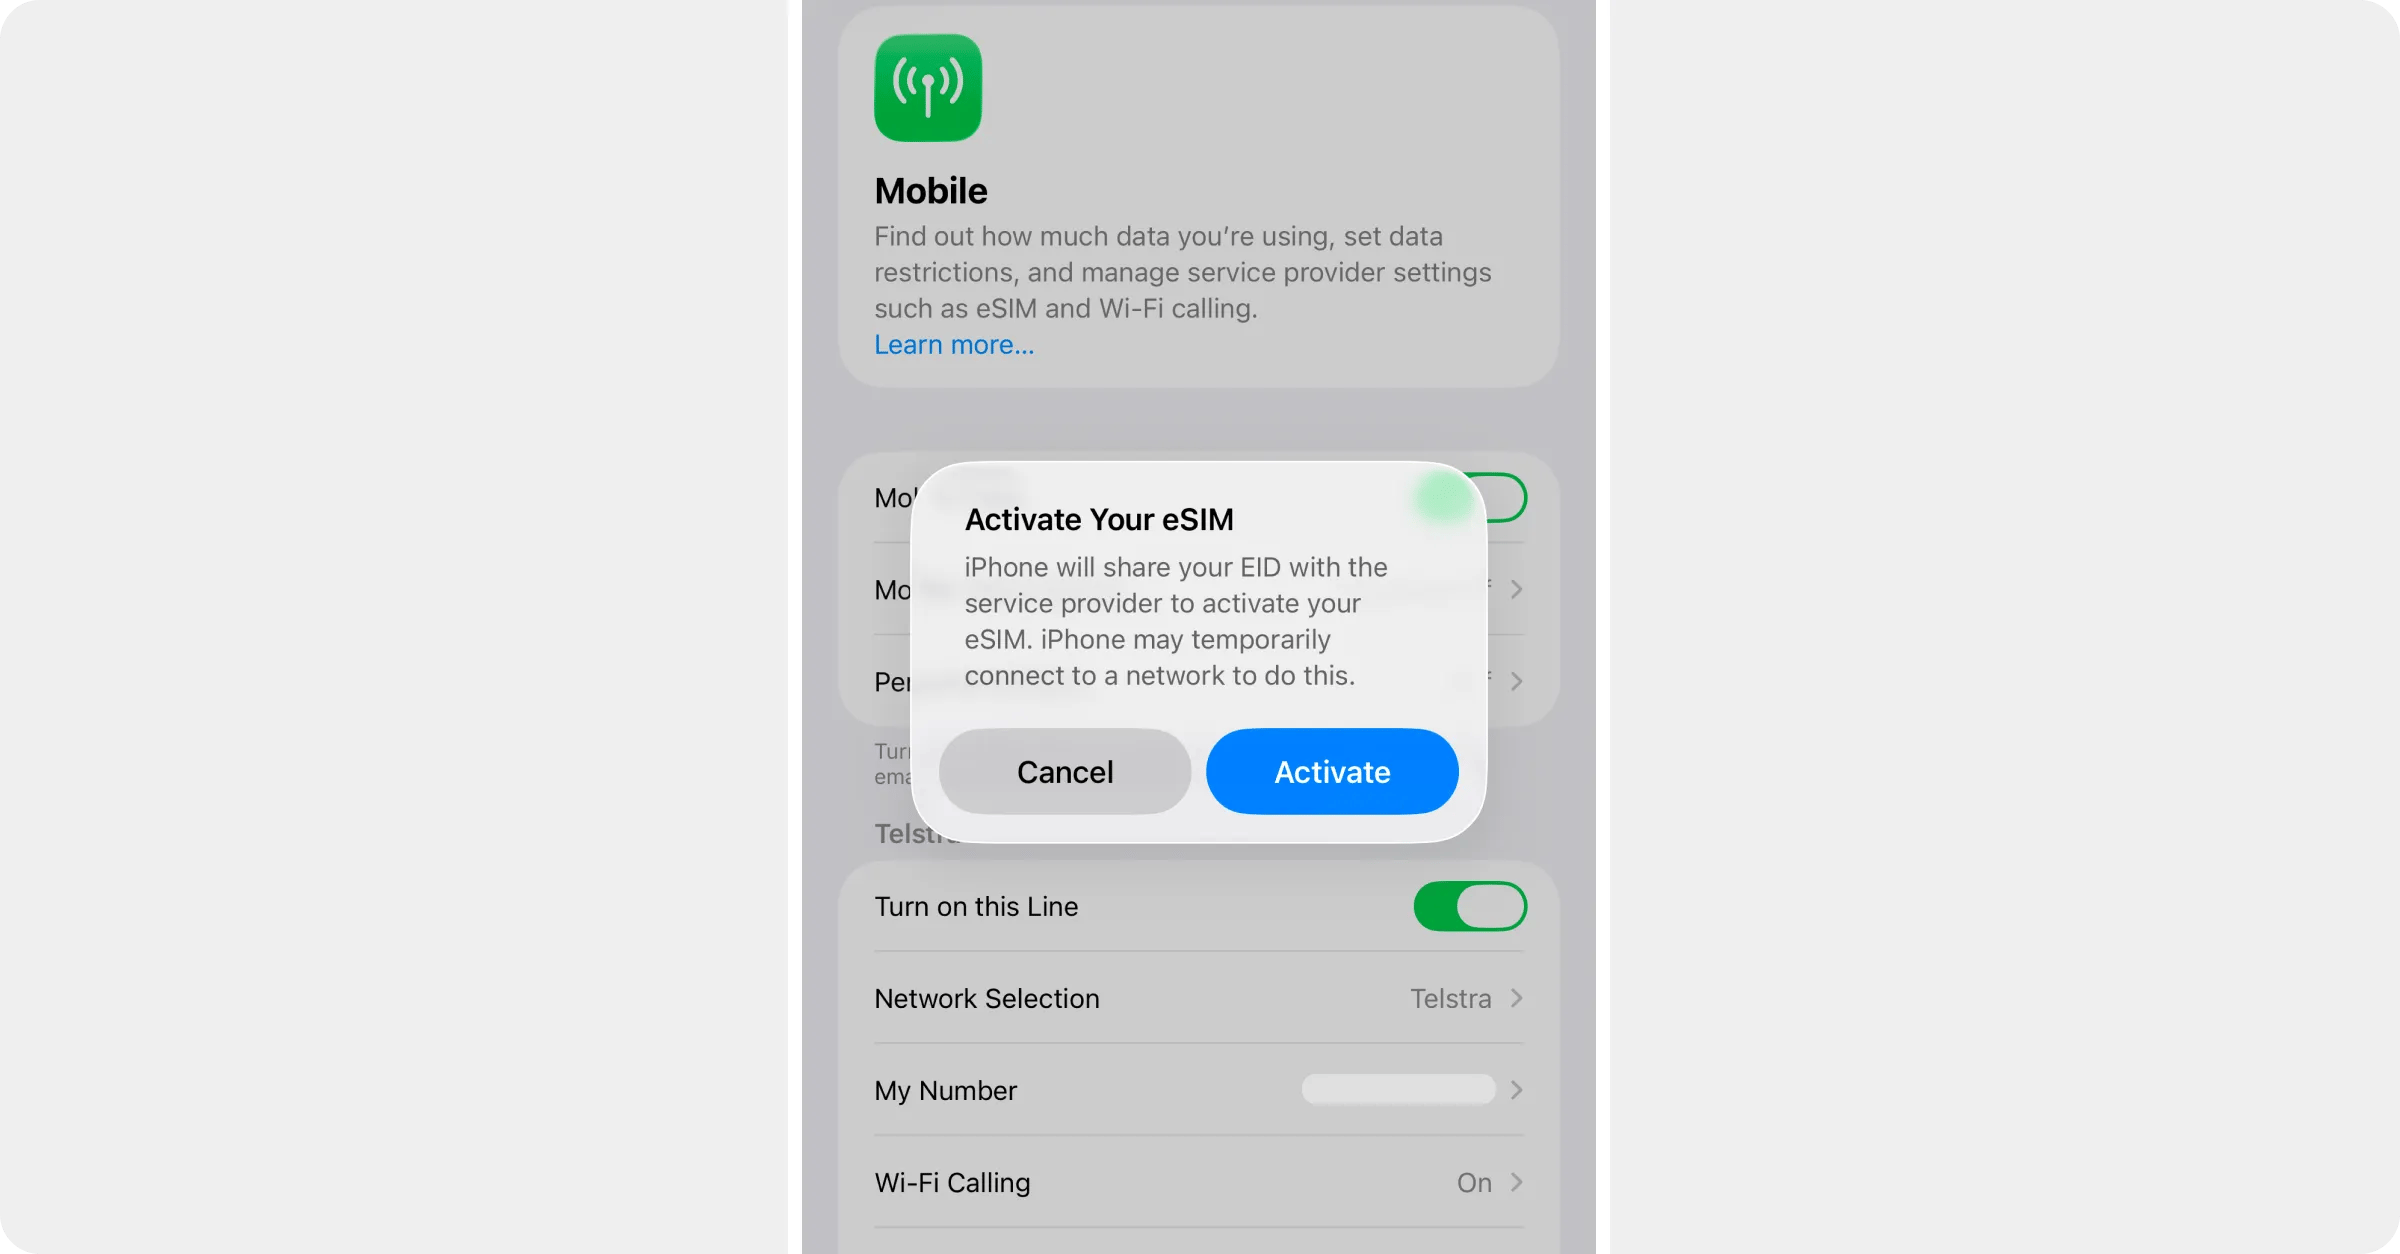
4
Follow the prompts
iOS asks a few questions. The answers that keep your normal number working as before:
- Label — call it something you’ll recognise, like Travel or the country you’re visiting.
- Default line — keep your normal SIM for calls and messages. Roamly is data-only.
- Mobile data — keep your normal SIM for now. You’ll switch to Roamly when you land.
5
Switch the Roamly line off until you land
Once iOS confirms the eSIM is installed, open Settings → Mobile (older iPhones say Mobile Service or Mobile Data; some regions say Cellular), tap your Roamly line and turn Turn on this Line off. The plan won’t start until you turn it on and connect at your destination.
6
Turn off Data Roaming on your normal SIM
While you’re still at home: in Settings → Mobile, tap your normal SIM under SIMs (usually labelled Primary) and turn Data Roaming off. That’s the switch that stops your home carrier charging you overseas. If you won’t need calls or texts on your number while you’re away, you can turn that line off entirely instead; it comes back exactly as it was when you switch it on at home.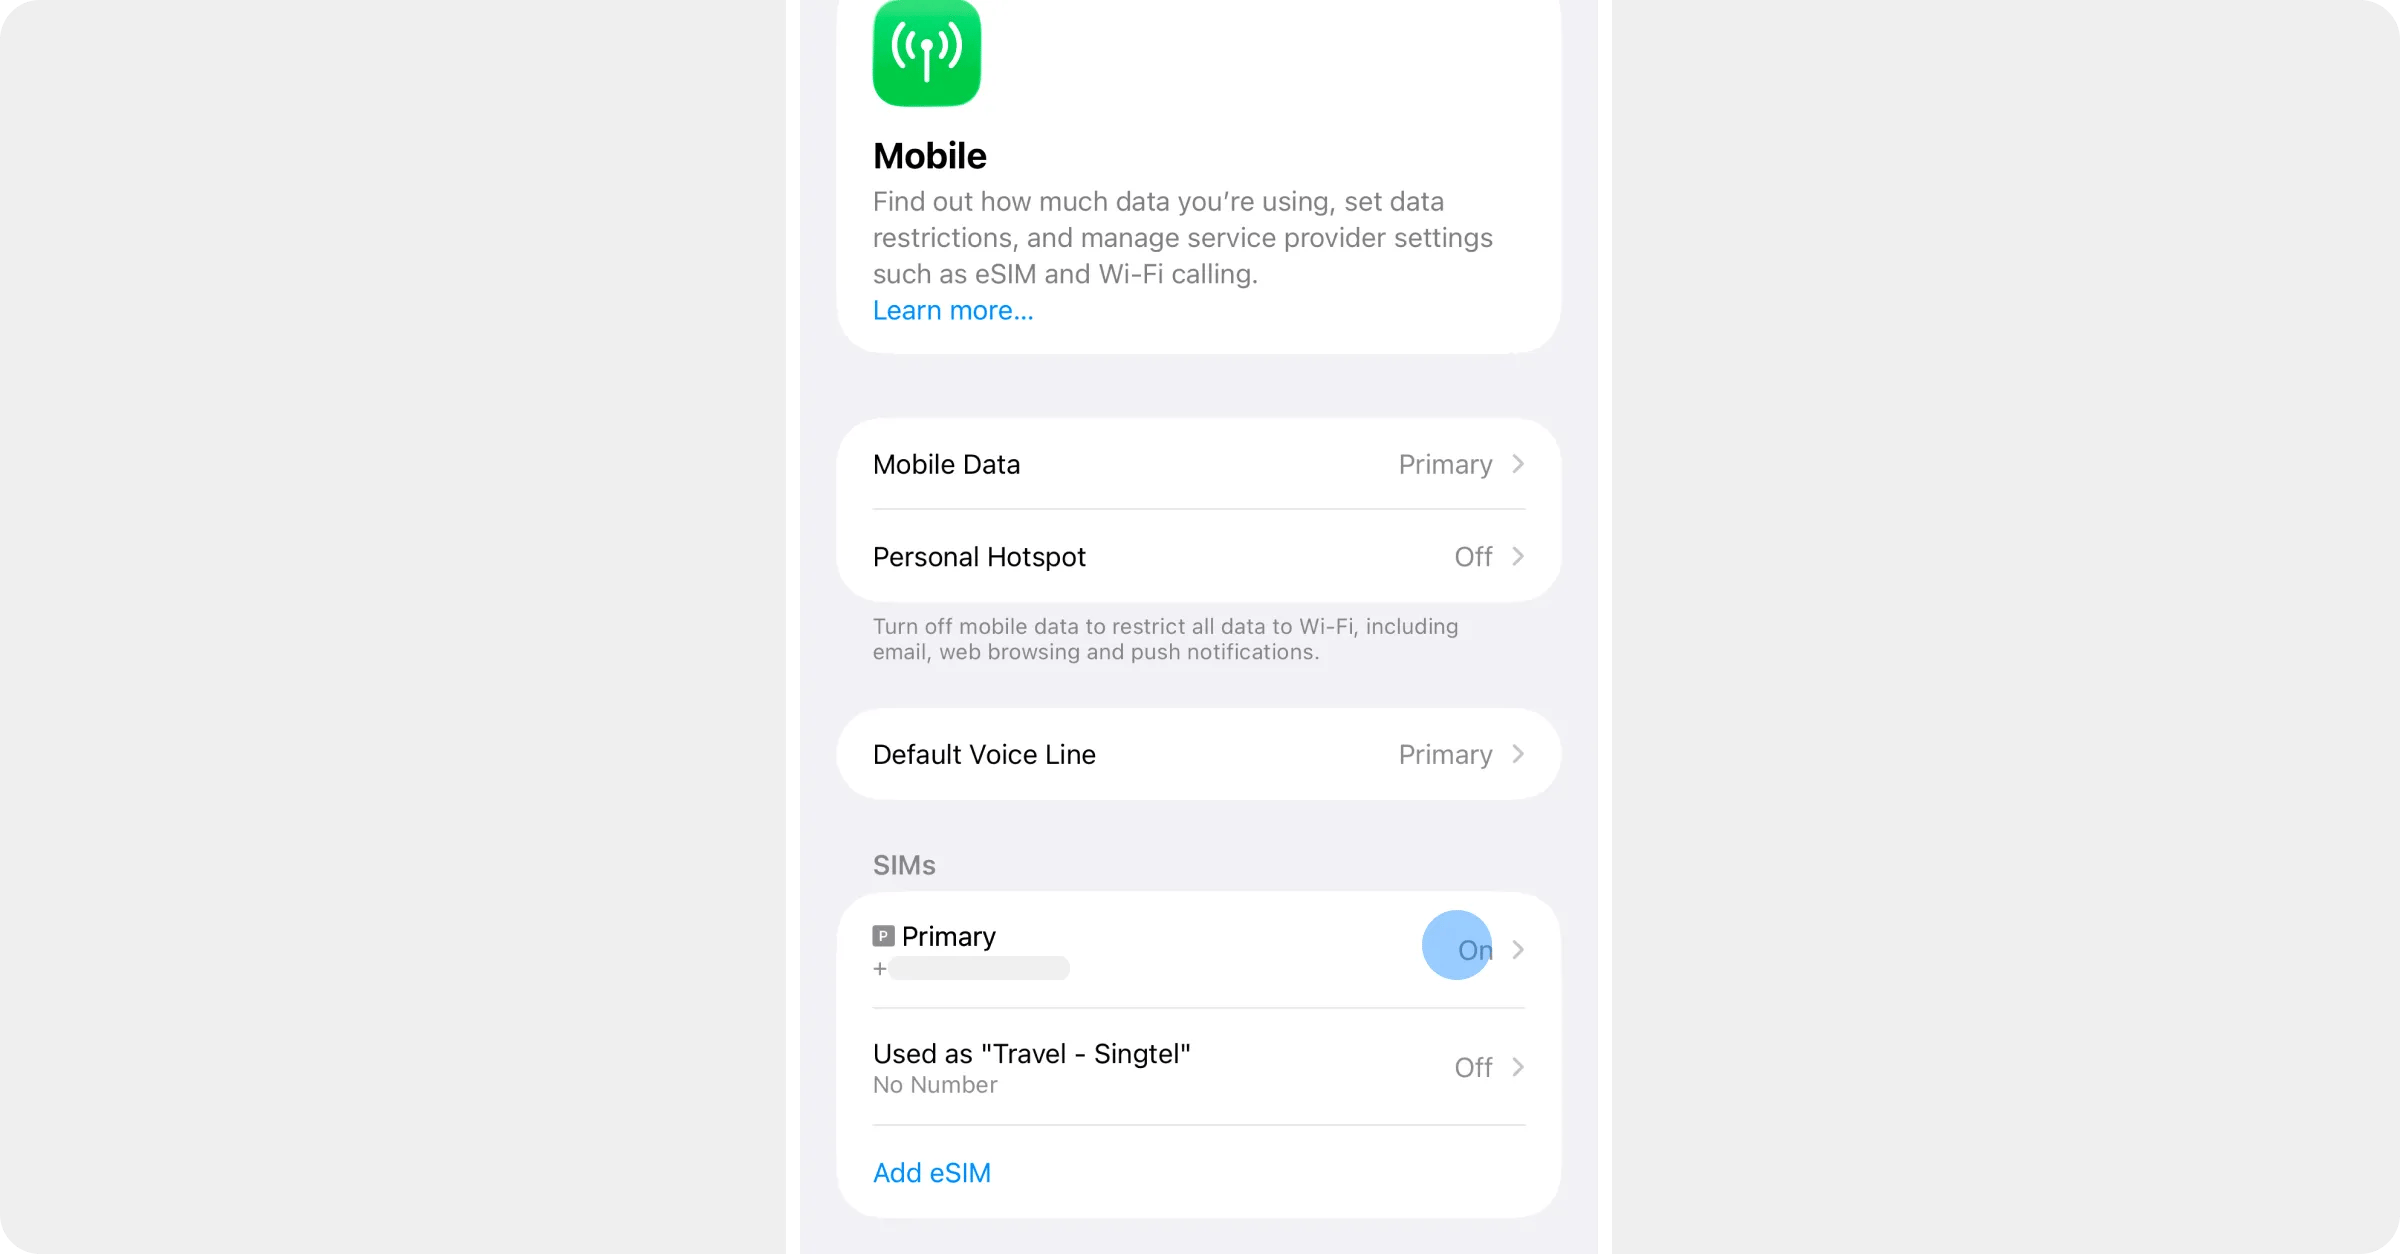
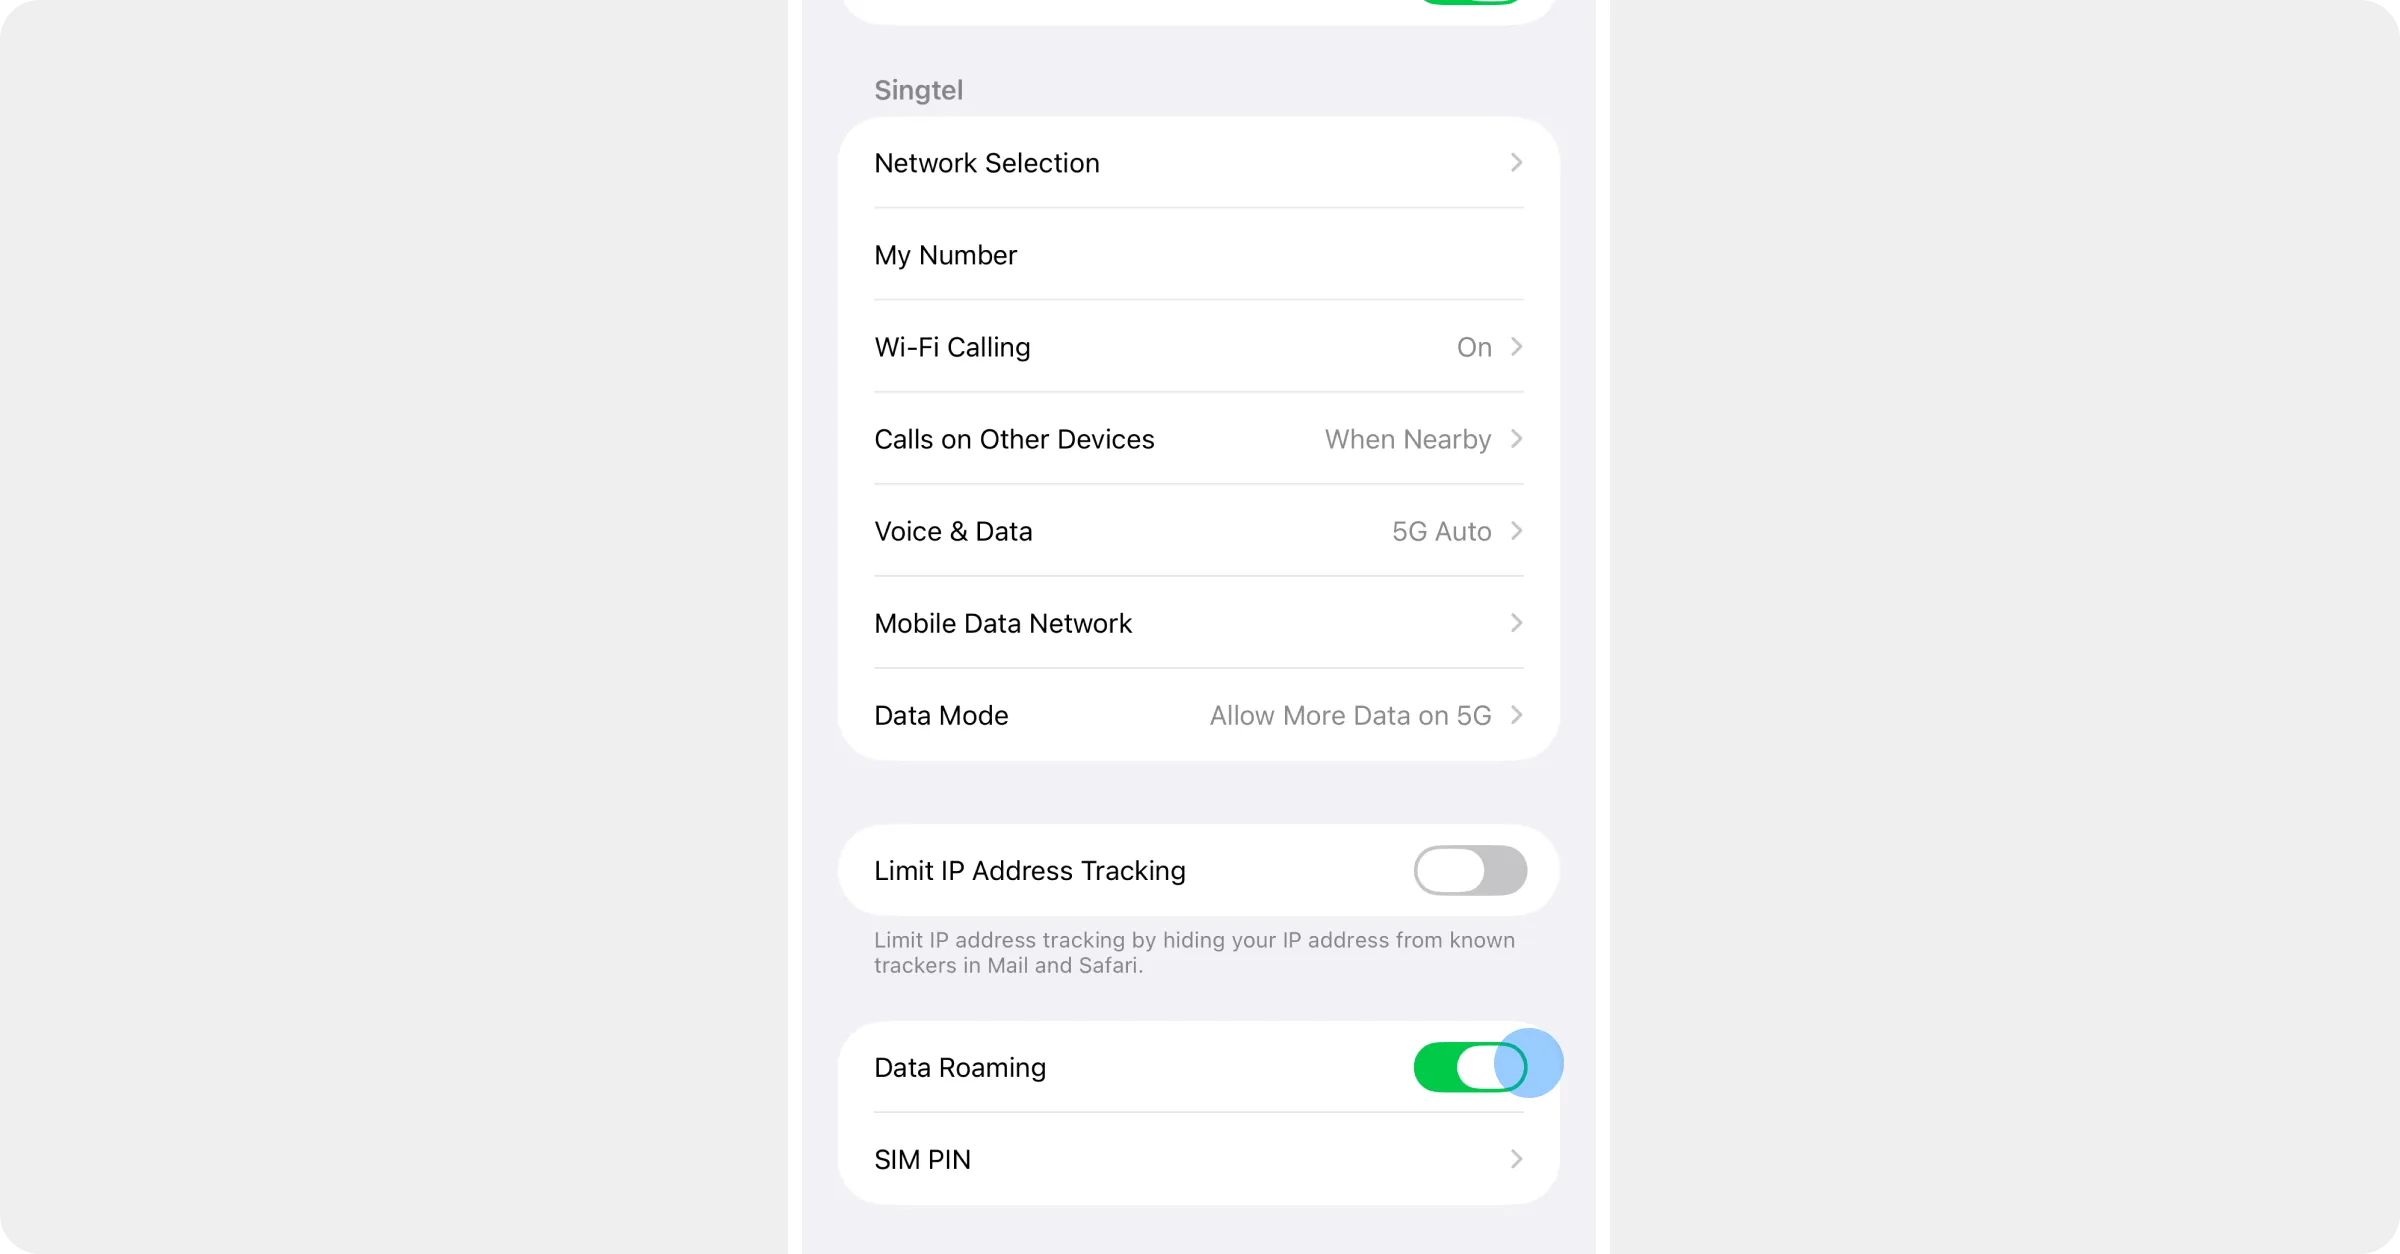
Back in the app your plan now shows Installed on your device. That’s it until you fly.
When you land
Three switches get you online: turn the Roamly line on, select it for mobile data, and turn on Data Roaming for that line only. Follow Just landed? How to activate your eSIM; the app shows the same steps on your plan page once the eSIM is installed.Something not working?
- No Install on this device button? Your plan is still being set up — it usually takes under five minutes. See I paid but can’t see my eSIM.
- iOS showed an error or nothing happened? See My eSIM won’t install.
- Installing on someone else’s iPhone? Use a QR code instead.