
- iPhone
- Android
1
Turn on your Roamly line
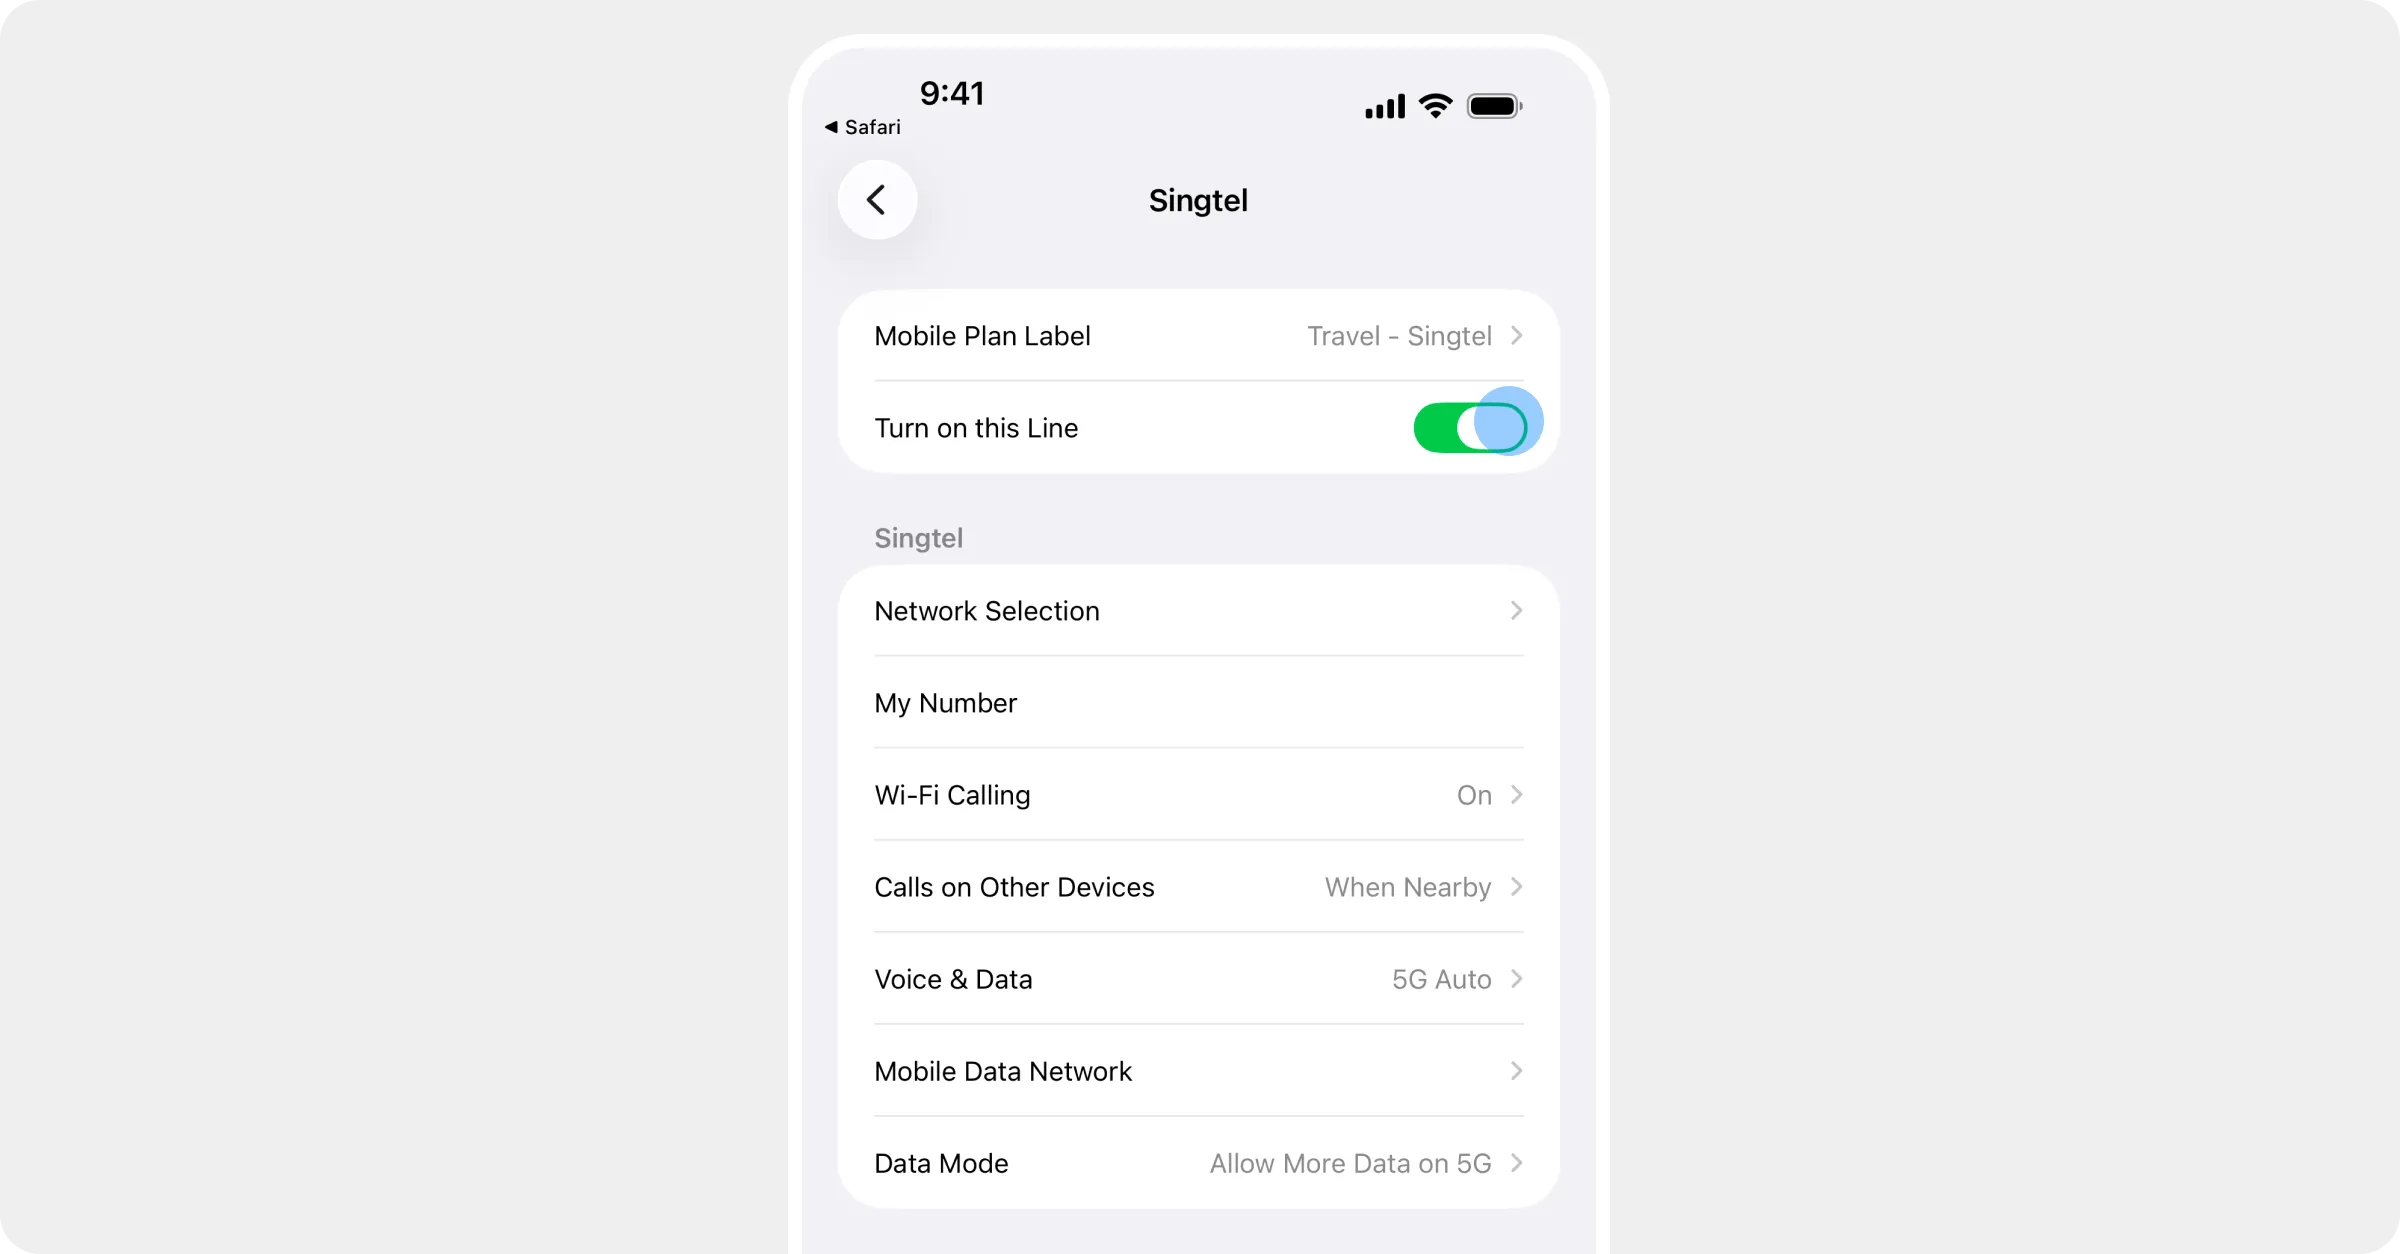
Open Settings → Mobile (older iPhones say Mobile Service or Mobile Data; some regions say Cellular). Under SIMs, tap your Roamly line and turn Turn on this Line on. It’s usually labelled Travel or Secondary unless you renamed it, and iOS may add the network name after it.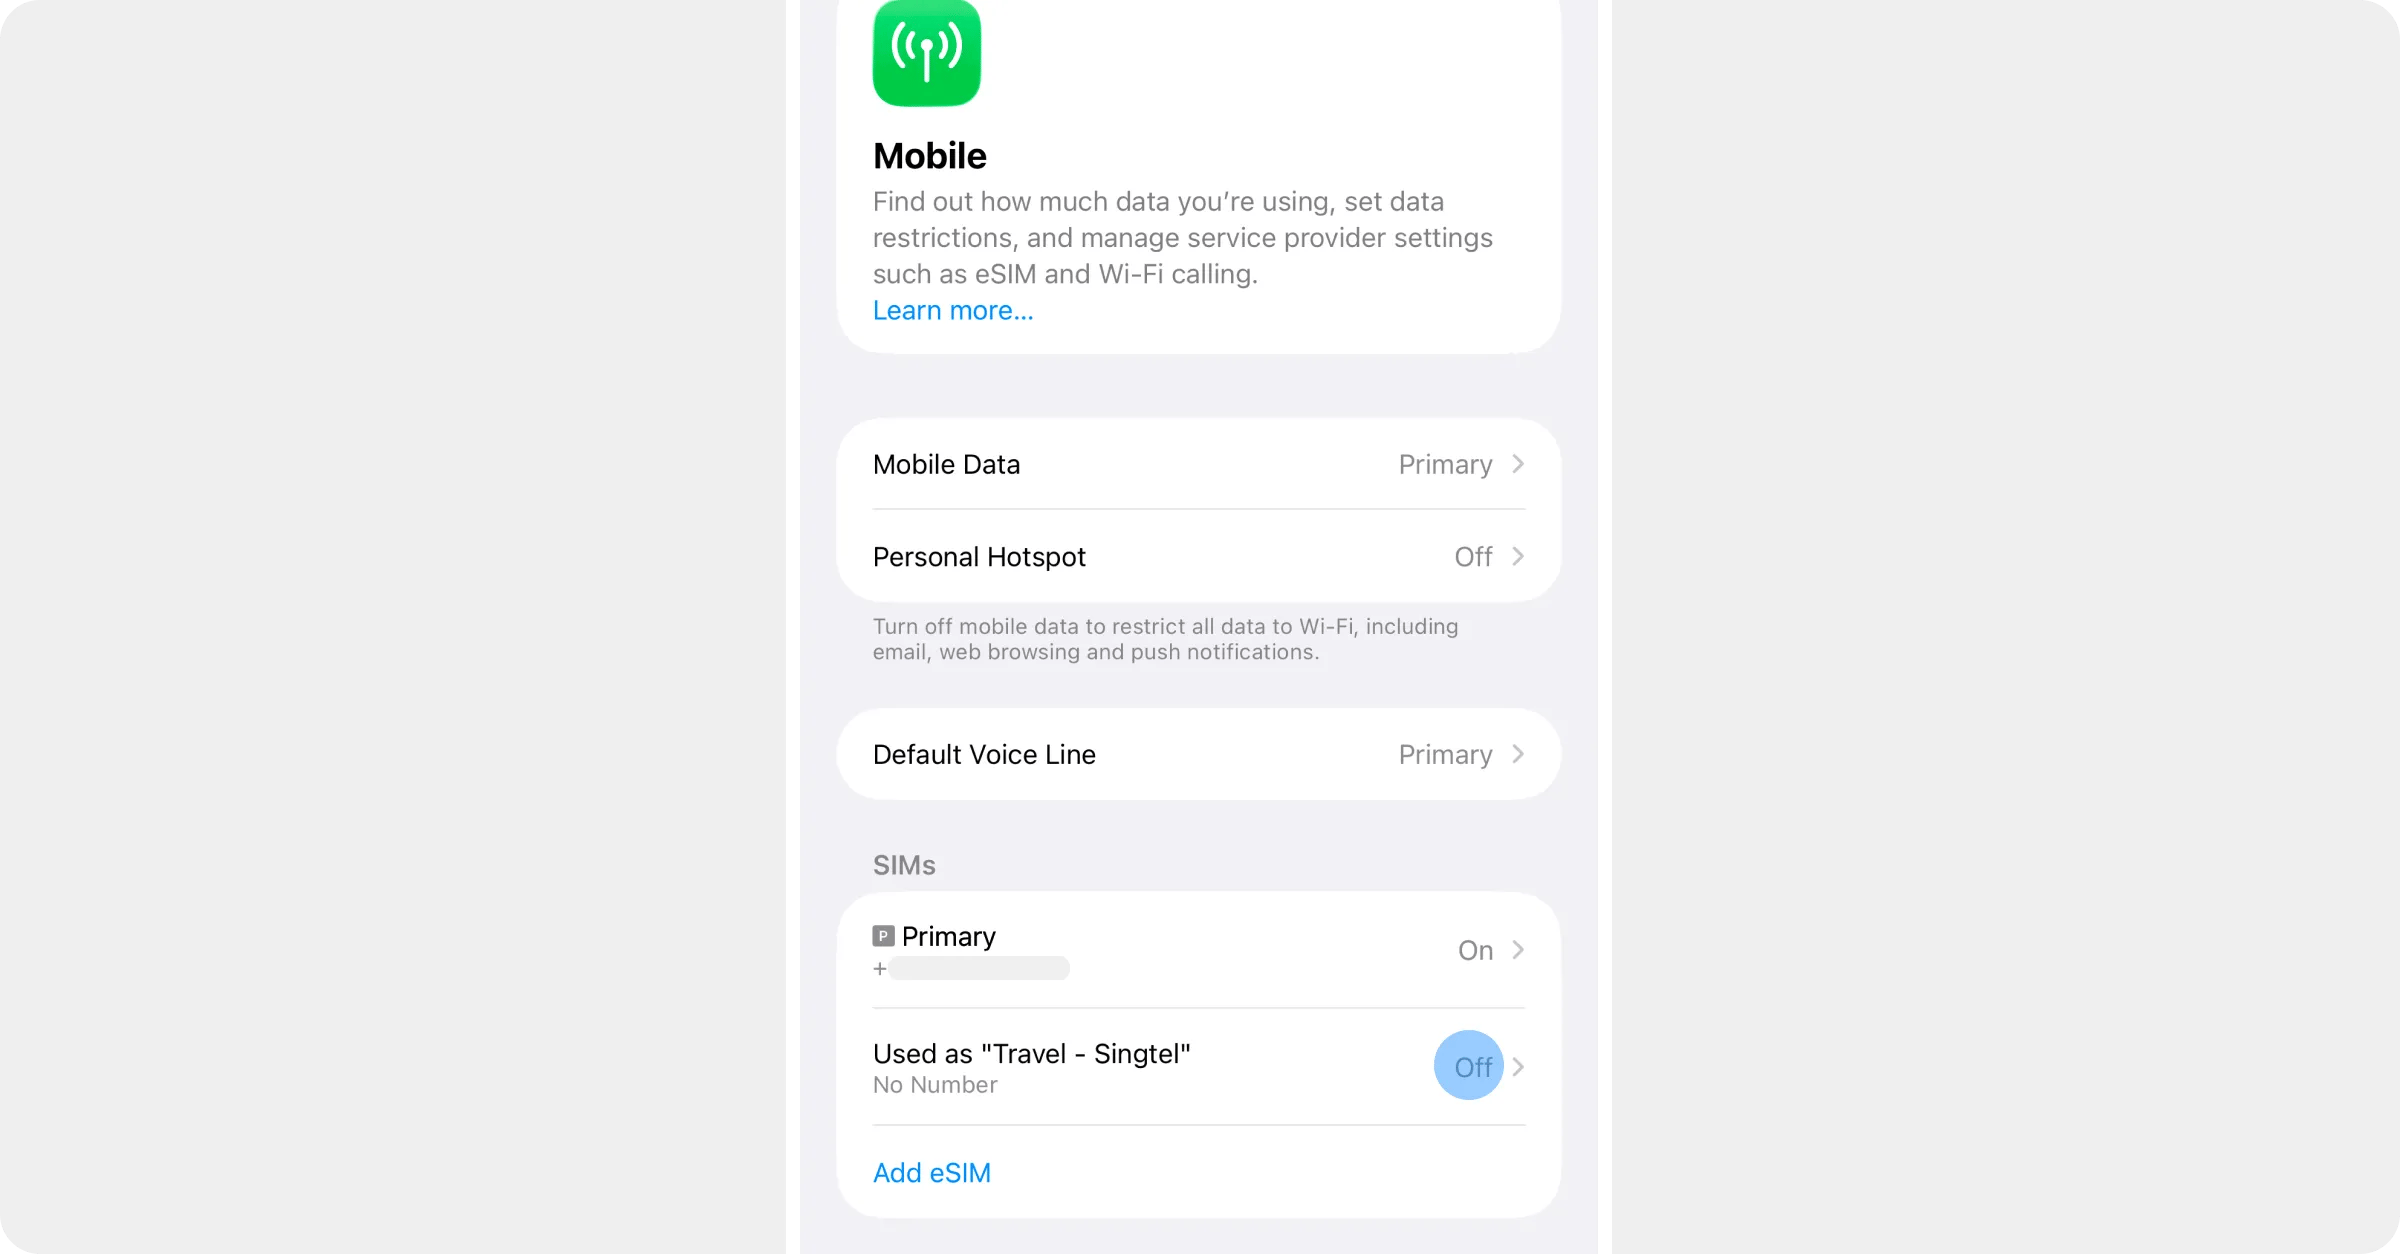
2
Select Roamly for mobile data
Back in Mobile, tap Mobile Data at the top and choose your Roamly line. Only data switches over; if you’ve kept your normal SIM on, calls and texts stay with it. Leave Allow Mobile Data Switching off, so the phone can’t quietly fall back to your normal SIM.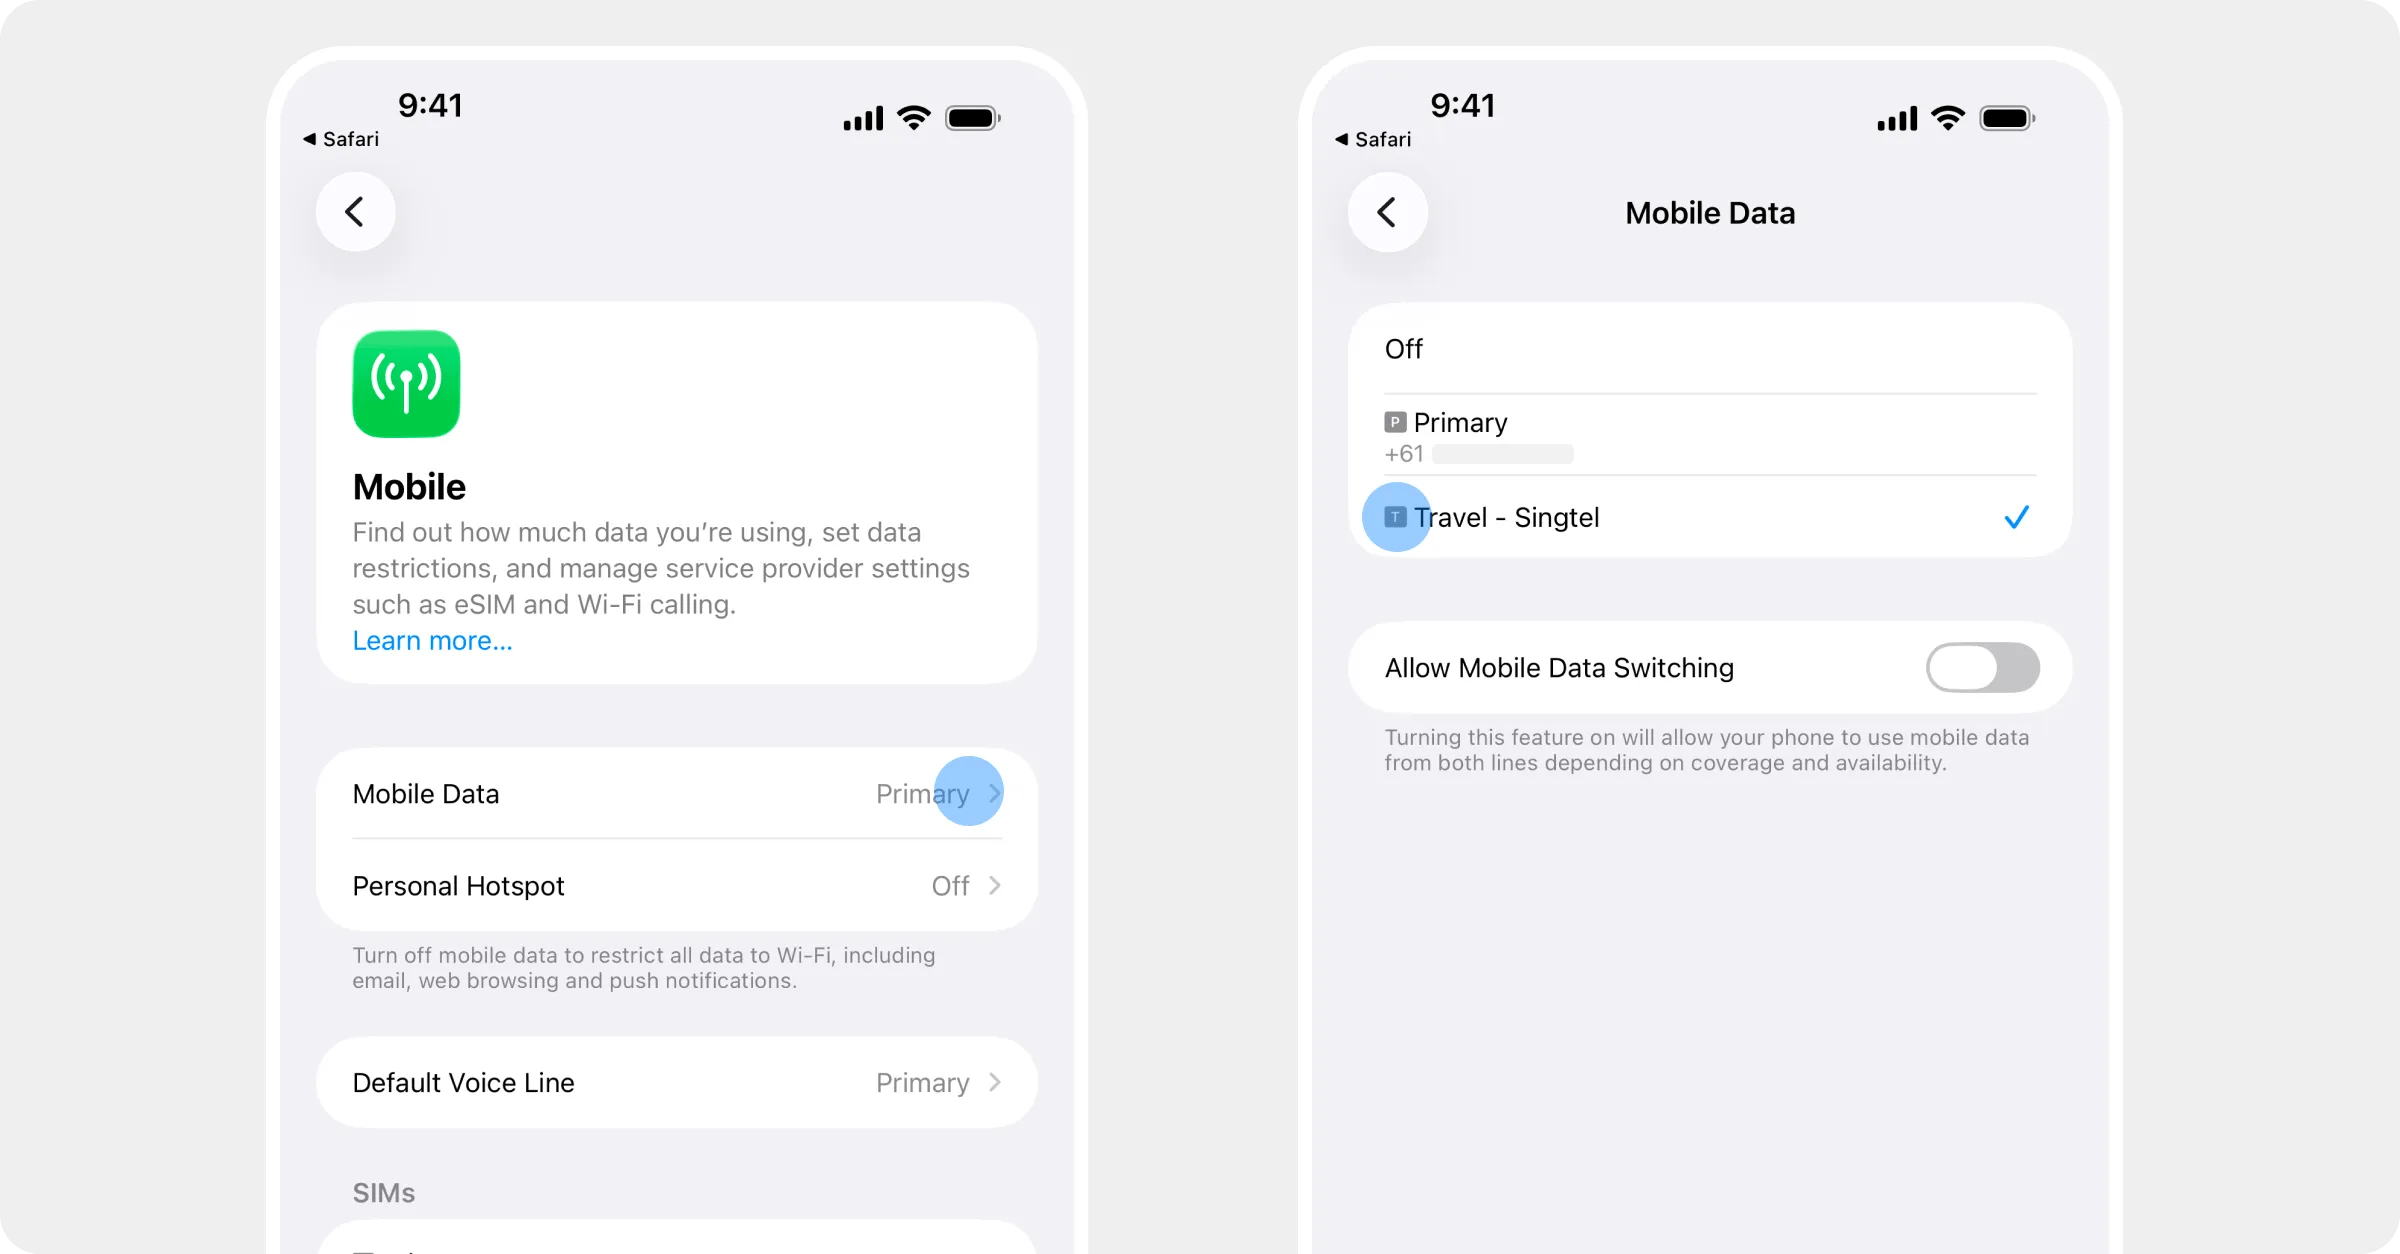
3
Turn on Data Roaming for the Roamly line
Tap your Roamly line again and turn Data Roaming on. Roaming sounds scary; it isn’t here. Your plan price is all you pay, and this switch just lets your phone use the local network. Only turn it on for the Roamly line.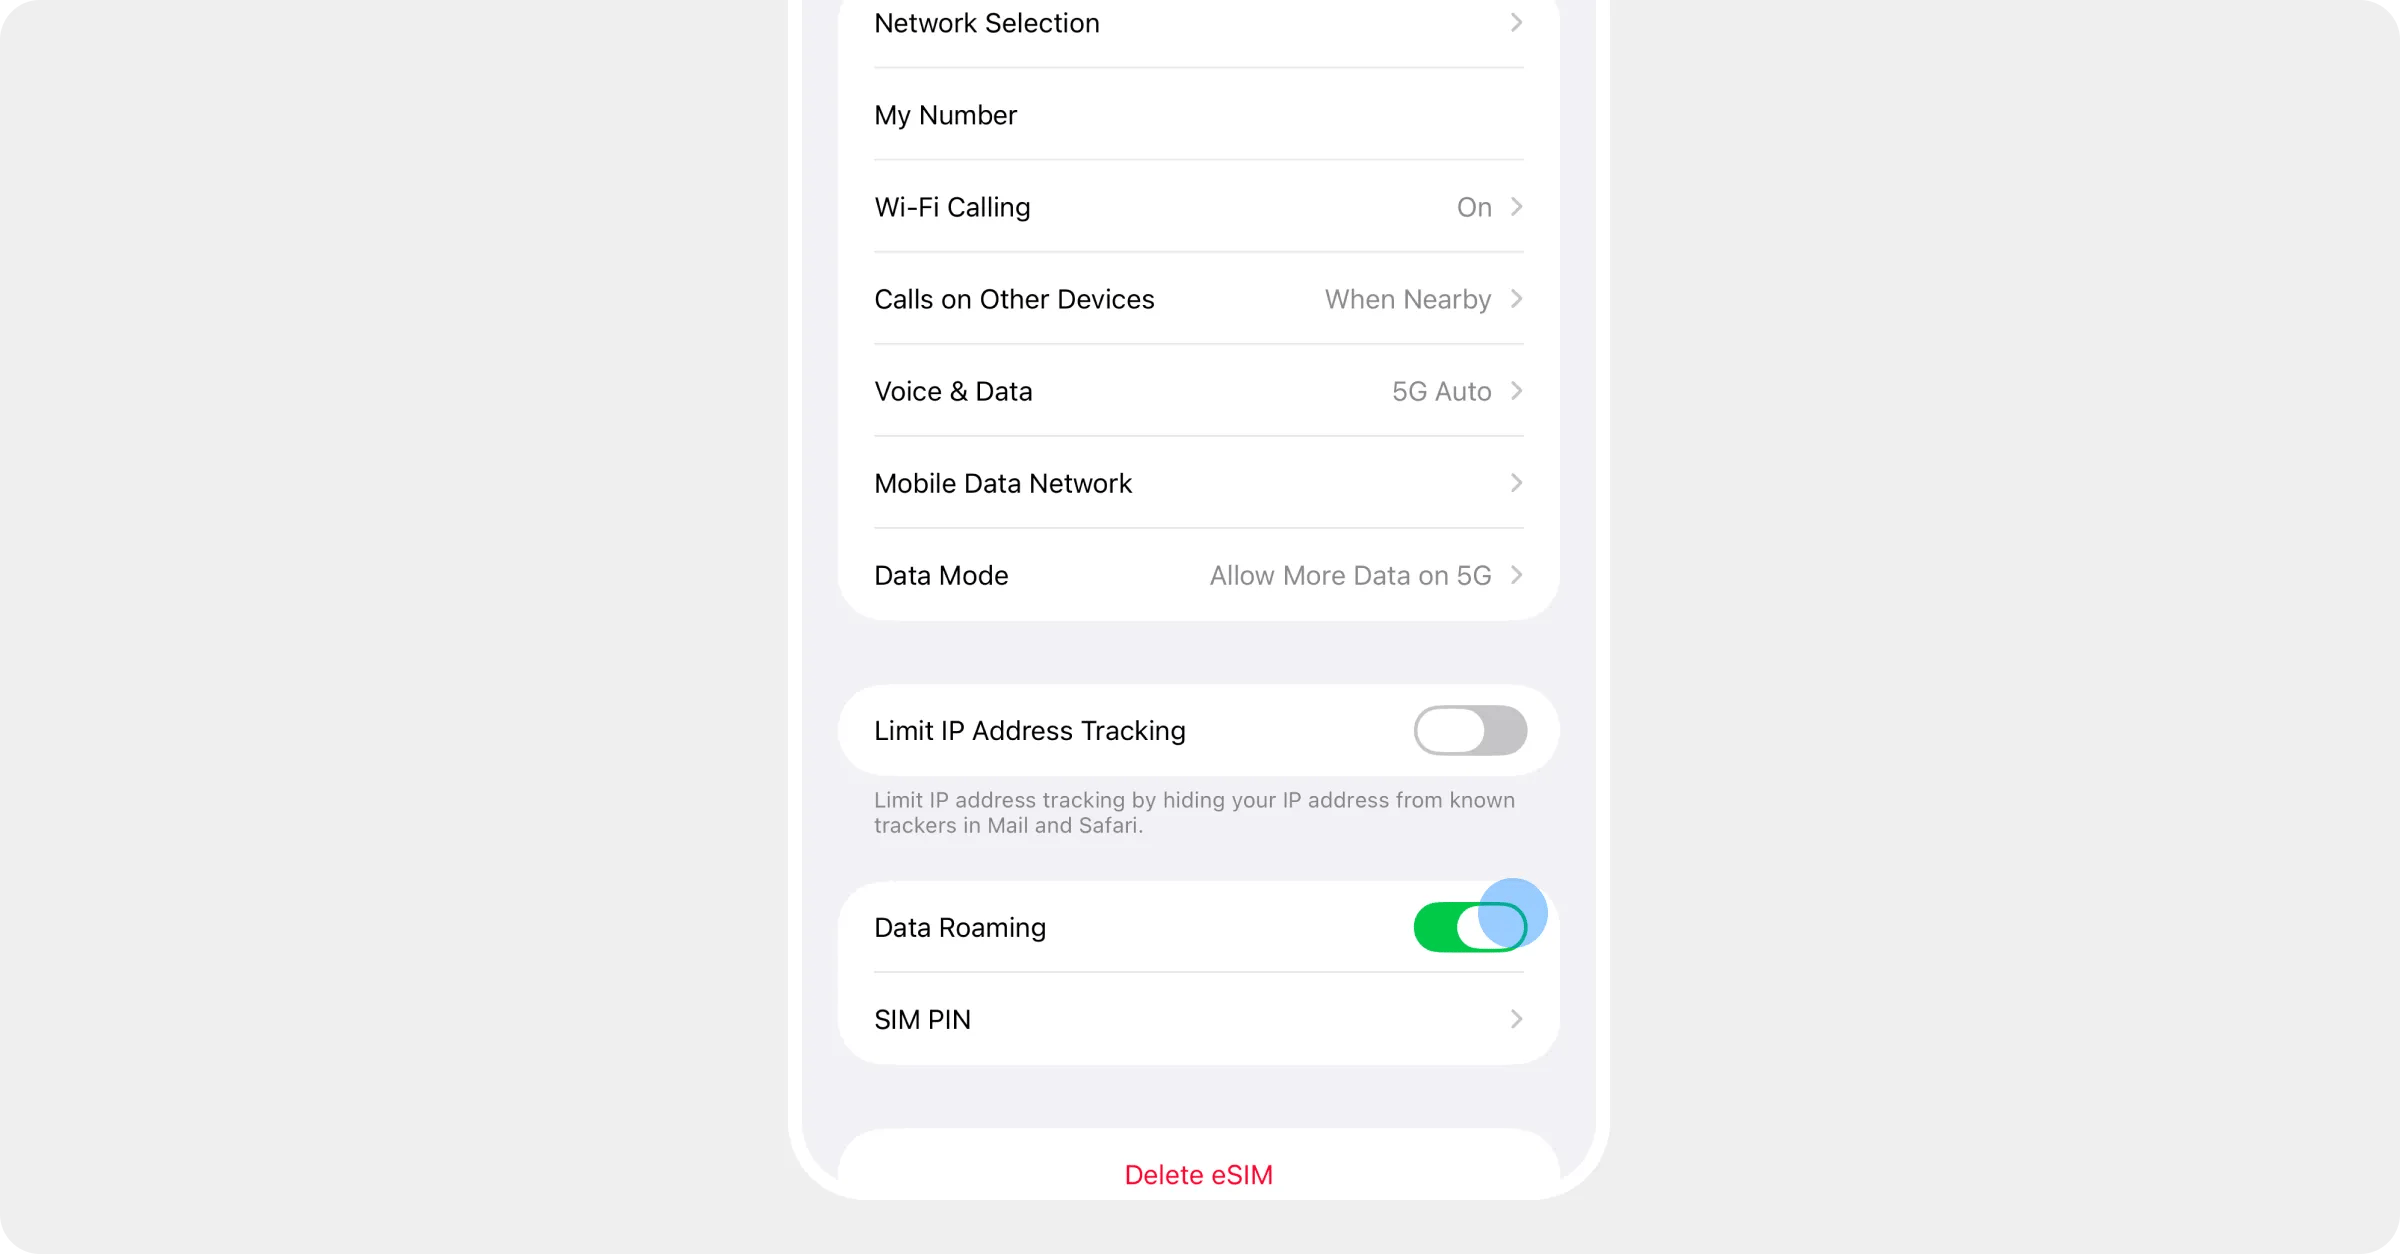
4
Let it connect
Most iPhones find the local network within a minute. If the status bar still shows no signal, flick Airplane Mode on for ten seconds and off again.
You’re online when the status bar shows signal on the Roamly line and a web page loads. Your plan page changes to Active once the eSIM has connected, and the days start counting from now.