> ## Documentation Index
> Fetch the complete documentation index at: https://support.onroamly.com/llms.txt
> Use this file to discover all available pages before exploring further.
# Install from the website on iPhone
> Open My eSIMs in Safari on the iPhone you'll travel with and tap Add to iPhone. Settings opens with the eSIM ready to add.
No app needed: the website can hand the eSIM straight to iOS, as long as you open it on the iPhone you want the eSIM on.
Run through the [four quick checks](/installing/before-you-install) first if this is your first eSIM.
In Safari on the iPhone you'll travel with, sign in at [onroamly.com/my-esims](https://onroamly.com/my-esims) and tap your eSIM.
Under **Install your eSIM**, tap **Add to iPhone** (one-touch install on this device). Safari hands the eSIM to iOS.
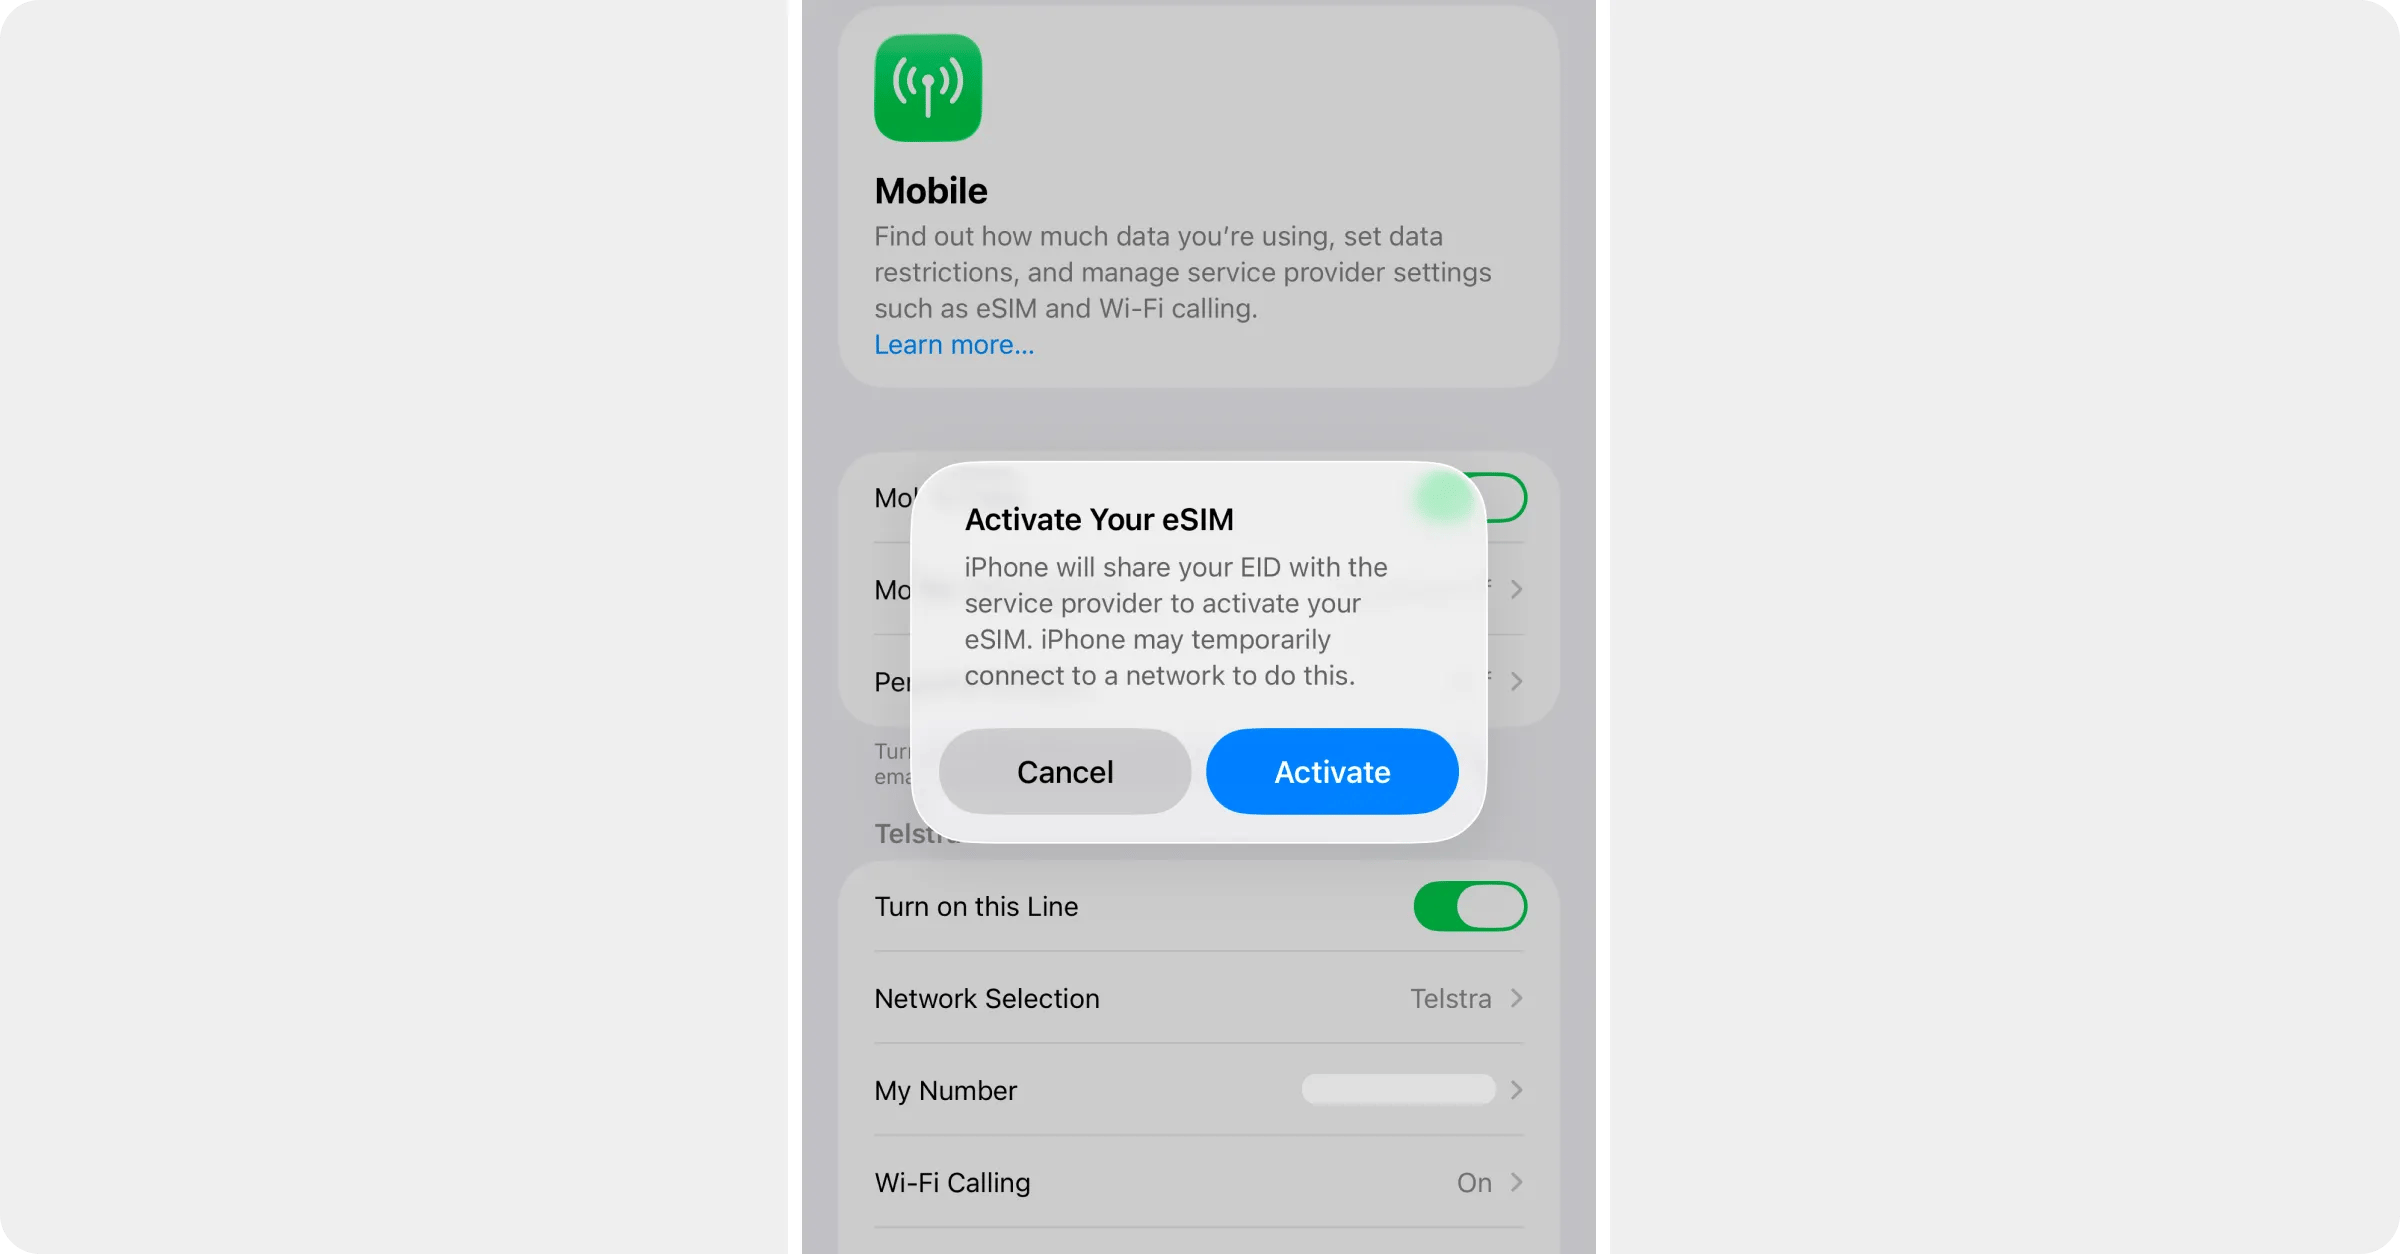
iOS opens Settings and asks to activate your eSIM. Tap **Activate**. The message about sharing your EID with the service provider is normal: it's how every eSIM is delivered to a phone.
 iOS asks a few questions. The answers that keep your normal number working as before:
* **Label** — call it something you'll recognise, like *Travel* or the country you're visiting.
* **Default line** — keep your normal SIM for calls and messages. Roamly is data-only.
* **Mobile data** — keep your normal SIM for now. You'll switch to Roamly when you land.
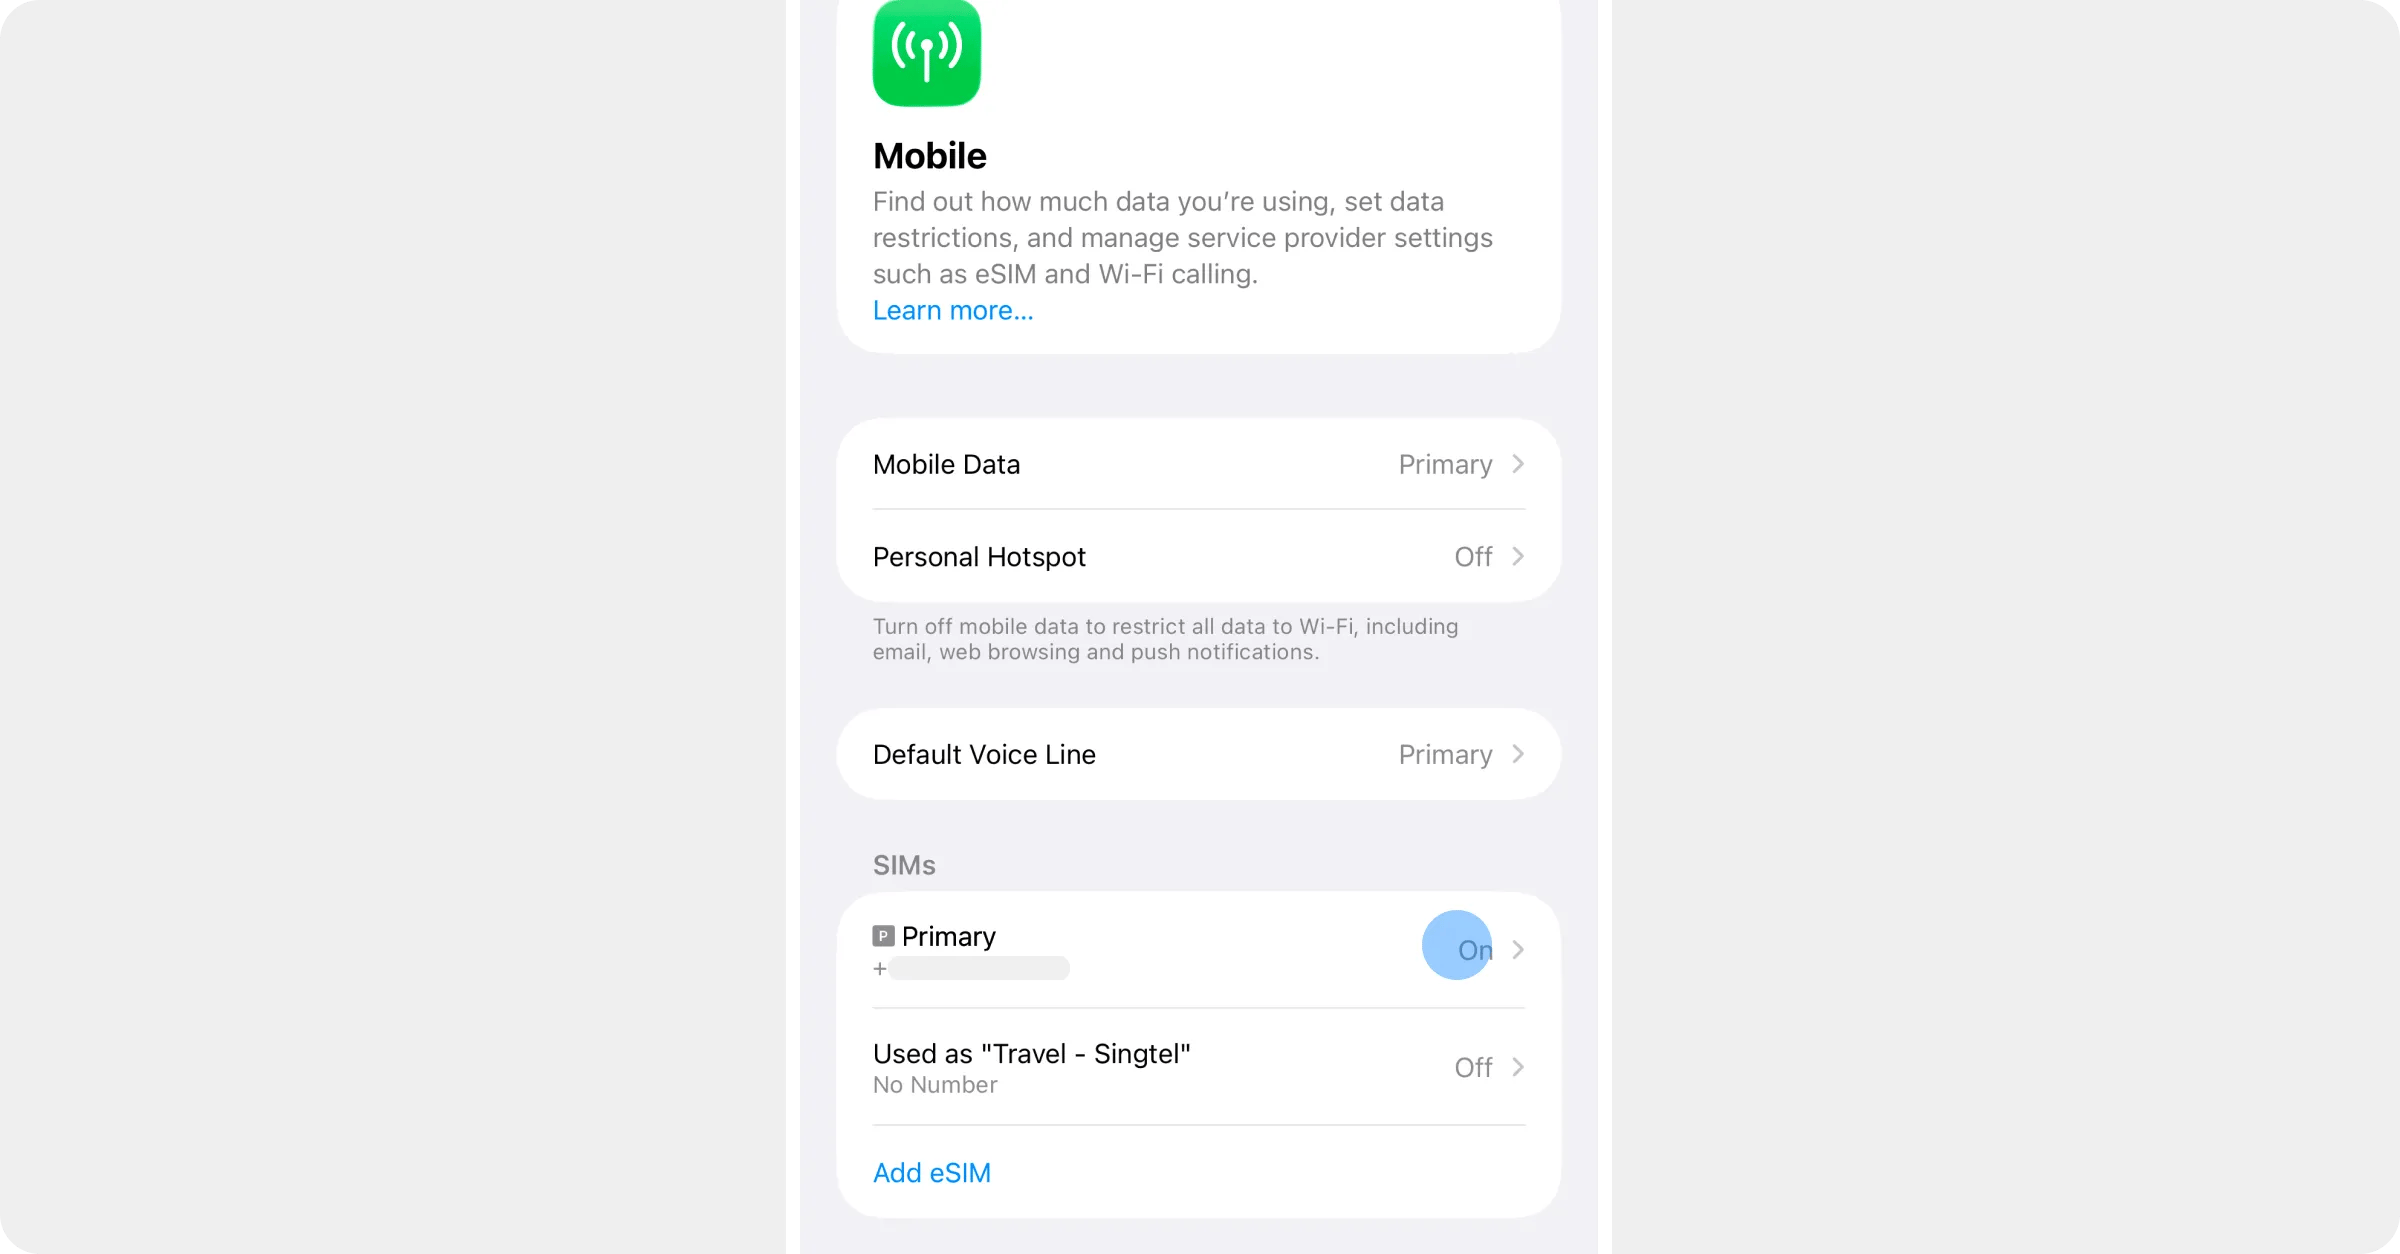
Once iOS confirms the eSIM is installed, open **Settings → Mobile** (older iPhones say *Mobile Service* or *Mobile Data*; some regions say *Cellular*), tap your Roamly line and turn **Turn on this Line** off. The plan won't start until you turn it on and connect at your destination.
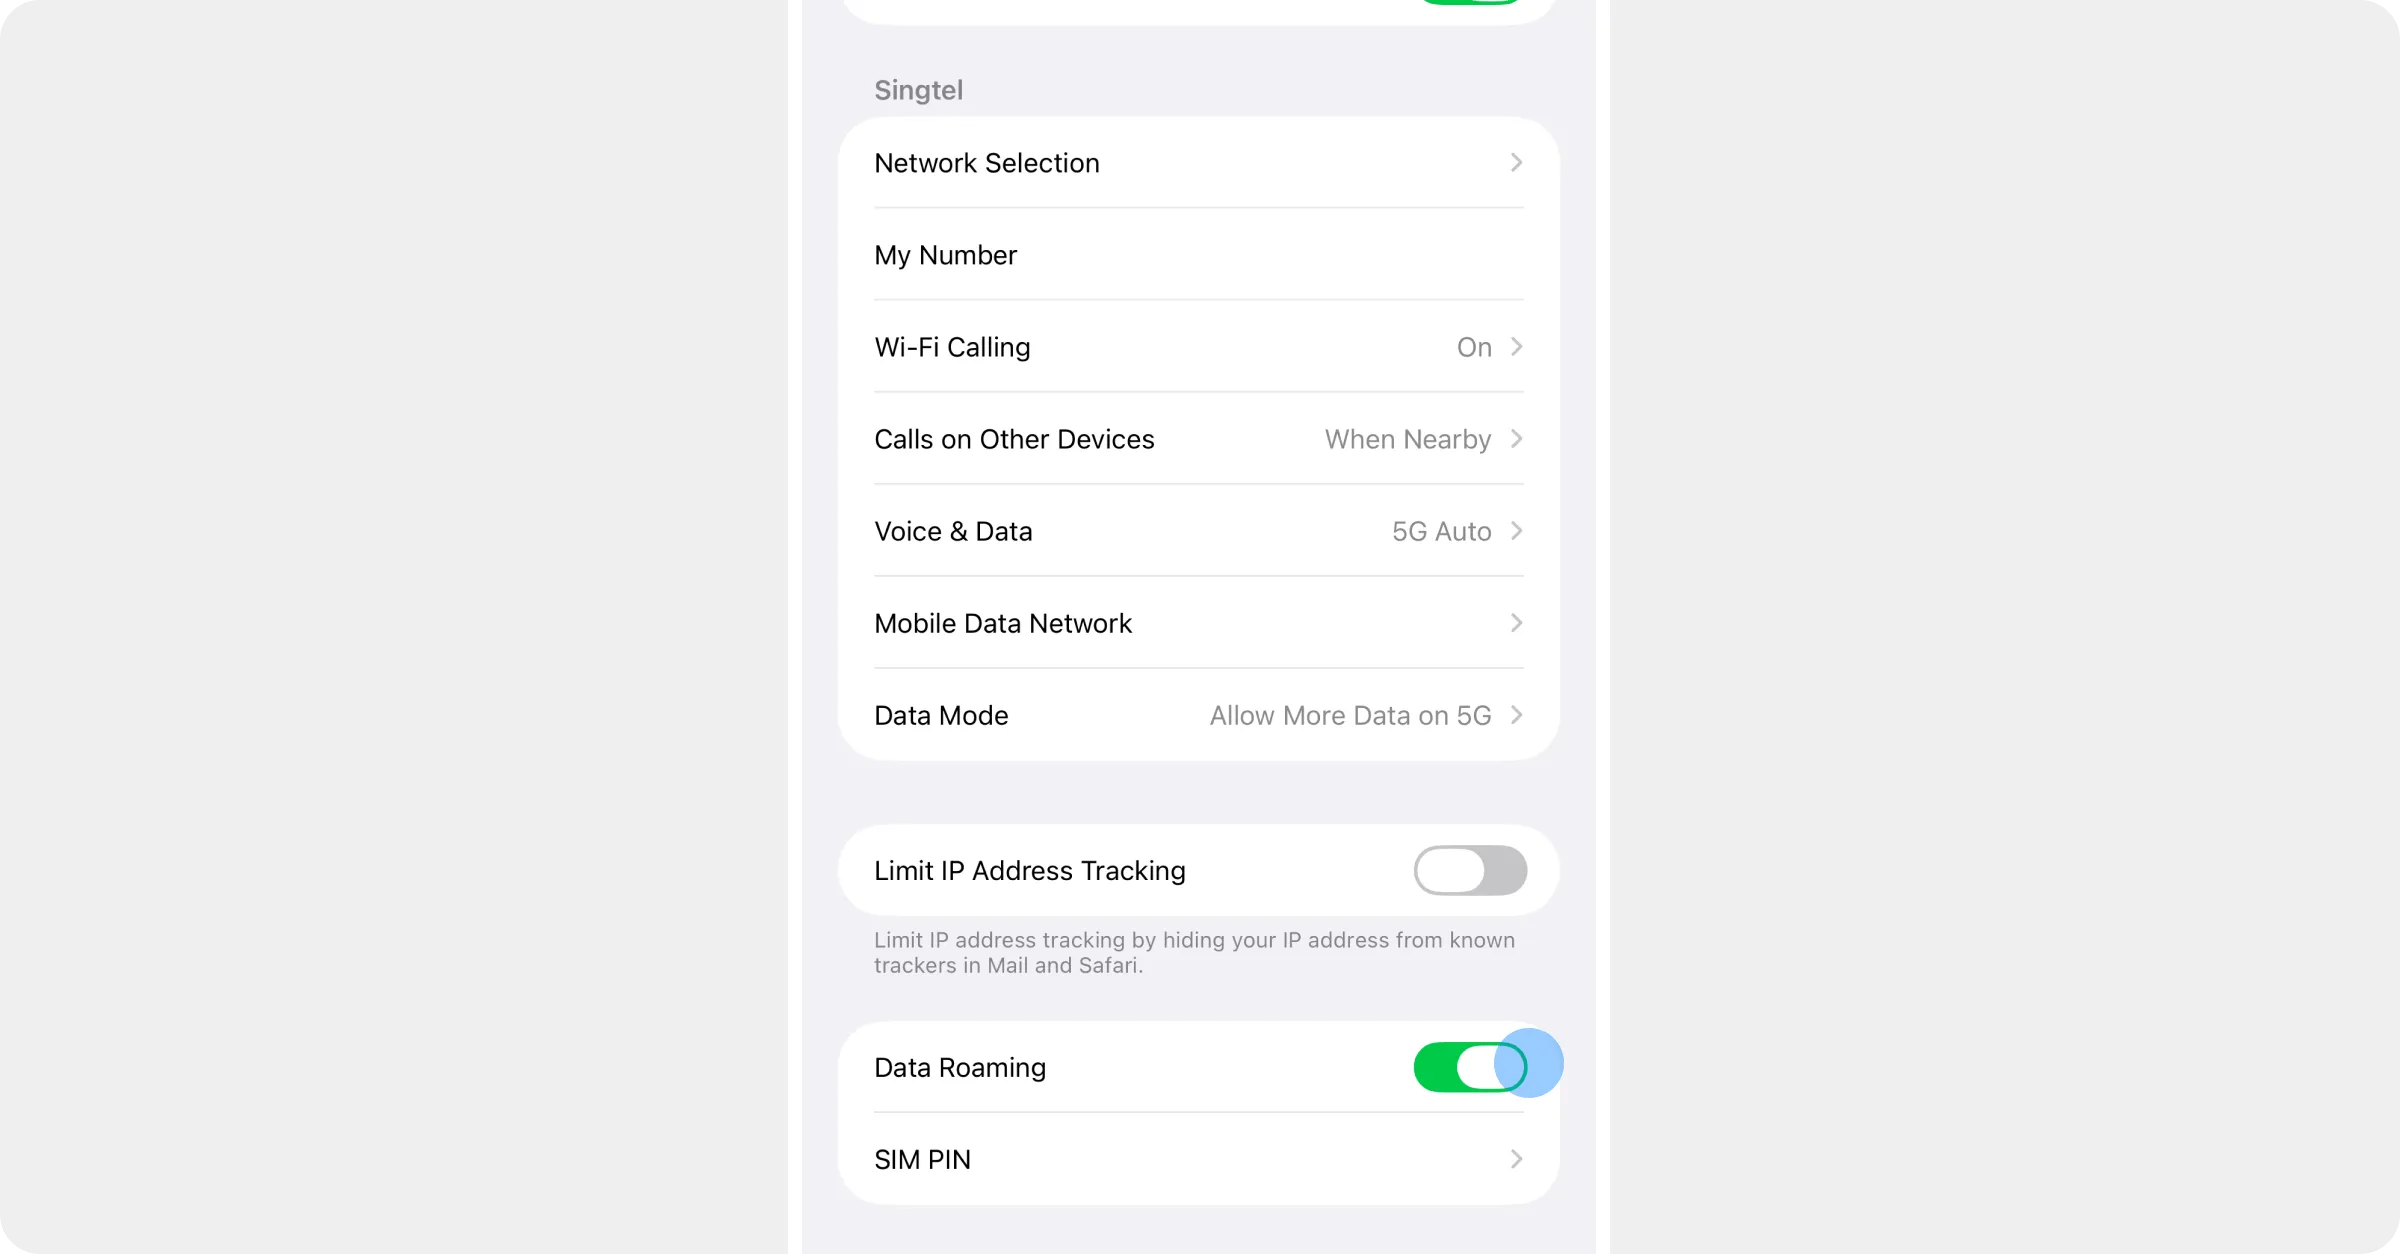
While you're still at home: in **Settings → Mobile**, tap your normal SIM under SIMs (usually labelled *Primary*) and turn **Data Roaming** off. That's the switch that stops your home carrier charging you overseas. If you won't need calls or texts on your number while you're away, you can turn that line off entirely instead; it comes back exactly as it was when you switch it on at home.
iOS asks a few questions. The answers that keep your normal number working as before:
* **Label** — call it something you'll recognise, like *Travel* or the country you're visiting.
* **Default line** — keep your normal SIM for calls and messages. Roamly is data-only.
* **Mobile data** — keep your normal SIM for now. You'll switch to Roamly when you land.
Once iOS confirms the eSIM is installed, open **Settings → Mobile** (older iPhones say *Mobile Service* or *Mobile Data*; some regions say *Cellular*), tap your Roamly line and turn **Turn on this Line** off. The plan won't start until you turn it on and connect at your destination.
While you're still at home: in **Settings → Mobile**, tap your normal SIM under SIMs (usually labelled *Primary*) and turn **Data Roaming** off. That's the switch that stops your home carrier charging you overseas. If you won't need calls or texts on your number while you're away, you can turn that line off entirely instead; it comes back exactly as it was when you switch it on at home.
 Back on the website your eSIM's status changes to **Installed** within a minute or so.
## On a computer?
**Add to iPhone** only works on the iPhone itself, because it opens that phone's Settings. If you're on a computer the website will say so and offer the QR code instead: leave it on screen and scan it with the iPhone. See [Install with a QR code or manual setup](/installing/iphone/qr-code-or-manual).
## When you land
Three switches get you online: turn the Roamly line on, select it for mobile data, and turn on Data Roaming for that line only. Follow [Just landed? How to activate your eSIM](/installing/when-you-land).
## Something not working?
* No **Add to iPhone** button? Your eSIM is still being set up — usually under five minutes. See [I paid but can't see my eSIM](/troubleshooting/before-you-go/cant-see-my-esim).
* iOS showed an error or nothing happened? See [My eSIM won't install](/troubleshooting/before-you-go/wont-install).
Back on the website your eSIM's status changes to **Installed** within a minute or so.
## On a computer?
**Add to iPhone** only works on the iPhone itself, because it opens that phone's Settings. If you're on a computer the website will say so and offer the QR code instead: leave it on screen and scan it with the iPhone. See [Install with a QR code or manual setup](/installing/iphone/qr-code-or-manual).
## When you land
Three switches get you online: turn the Roamly line on, select it for mobile data, and turn on Data Roaming for that line only. Follow [Just landed? How to activate your eSIM](/installing/when-you-land).
## Something not working?
* No **Add to iPhone** button? Your eSIM is still being set up — usually under five minutes. See [I paid but can't see my eSIM](/troubleshooting/before-you-go/cant-see-my-esim).
* iOS showed an error or nothing happened? See [My eSIM won't install](/troubleshooting/before-you-go/wont-install).